A few days ago, I started thinking about the difficulties of looking at the past through rose-colored glasses. Let's face it: life without electricity, equal voting rights, or antibiotics would be way harder. To explore this point further, let's look at life without two rather nice appliances (albeit just for the two weeks that we were on vacation in Canada).
1. Life Without a Dishwasher
At the island, we usually use two big enamelware basins for washing, one with hot rinse water and one with warm soapy water. We take turns, going two at a time, one to wash the dishes and one to dry. There are fun things about this. For as long as I can remember, we've sung old camp and vaudeville songs while drying dishes after dinner. (My grandfather is a big fan of Cole Porter.) I have fond memories of my cousins harmonizing over "Lida Rose" from The Music Man. And when you're not singing, it's a good time to chat with your dishwashing partner.
But those dishes add up: this year, we had six people up for two weeks, plus two visitors for several days. That's six to eight sets of dishes for breakfast, lunch, and dinner, every. Single. Day. Sometimes the mice get into the silverware drawer and you have to wash every fork, knife, and spoon. Your hands get dry from the soap. I've lived in apartments without dishwashers, but cleaning the dishes of two people is way different from doing the dishes of six or eight.
2. Life Without a Washing Machine
This is where the real pain lies. And funny enough, we used to be more modern when my mom was growing up. My grandmother and great-grandmother would haul a freestanding washing machine onto the rocks and set the thing going to wash clothes. Apparently it made an awful racket, but it did the job. Now that we no longer have such a handy appliance, we wash clothes by hand.
It's an inexact science. We need three or four big tubs, depending on the amount of clothes. The biggest tub we fill with warm, soapy water for washing; a smaller one with warm water for rinsing; and often one with bleachy water for serious stains. After letting the clothes soak in the soapy water, we (and by we I mean my mom, who always takes this on) use a clean metal plunger to mash them around and make sure the soap really gets in there. Stains you have to scrub out by hand. After a few rinses and some vigorous wringing, they're ready to hang on the line behind the cabin. Again, it's not all bad; it's a great time to catch up with my mom or talk through some teaching ideas.
Still, this is one of the most physical domestic activities I've ever seen. What with the plunging and the scrubbing and the wringing, you get a real workout. And we actually have it easy with running water, hot and cold, coming out of the pipes at the back of the house; there's no hauling of water up from the lake or pumps.
Imagine doing these chores for the rest of your life, lady readers. Laundry you could do once a week, but dishes every day. Is it any wonder that when 19th-century women had a little extra cash, they hired out their laundry before purchasing any other luxuries? I'm not dismissing the value of doing things by hand; certainly my family gets some enjoyment out of it, or we'd have invested in some appliances by now. But boy, do I love the 21st century.
Showing posts with label homesteading. Show all posts
Thursday, August 22, 2013
Hand wash only (II)
Labels:
canada,
cleaning,
domesticity,
family,
homesteading,
honesty,
lessons learned,
vacation
Monday, August 19, 2013
Hand wash only (I)
It's easy to wax nostalgic about the "good old days," that halcyon golden age when kids didn't do drugs or drink underage, and life was simpler, without cell phones and social media complicating things. (Yes, I'm guilty of this!) There are a few things wrong with this kind of thinking, though: first, the "good old days" never truly existed. Kids have always gotten into trouble and American life has always been complicated, just in different ways (think about the extreme social demands of the Gilded Age, or the sweeping poverty of the Great Depression). Second, this kind of rose-colored thinking always glosses over the hard parts of living in the past, like chores done without modern conveniences, attitudes towards marginalized groups, and a lack of equality.
In particular, I have trouble remembering the second reason. Who knows why; I'm a proud liberal feminist and there's no way I'd give up my right to vote. And each summer, living rustically on vacation reminds me how much I love modern conveniences. But there's something about that image of a simpler life, uncomplicated by technology and consumerism, that gets me every time.
So this week, let's take a closer look at one of the reasons why yearning for the simpler days is actually counterproductive. We're going to examine life without two modern domestic conveniences: the dishwasher and the washing machine, both of which my family does without when we're on vacation in Canada. While we do enjoy "getting back to the land," each summer I sort of wish we'd installed both machines when we wired the cabin for electricity thirty years ago. Why? Check in on Thursday to find out.
Labels:
canada,
domesticity,
family,
homesteading,
honesty,
lessons learned,
vacation
Tuesday, July 2, 2013
Line-drying laundry
For a few weeks the dryer in our apartment building has been broken. Problem? Easily solved. After putting in a call to the landlord, we hung our clothes fresh from the washing machine out to dry on the balcony.
It's easy to string a line of twine from the hooks already hanging from the balcony ceiling. Yes, they're more for hanging plants. But they do the job just as well.
I piled clothespins in a basket and, working quickly, clipped shirts and PJ's to the line. Because the balcony faces the street, I decided to dry delicates inside on a wooden clothes rack stolen from my parents' house.
We line-dry clothes every summer when we're on vacation, but I always forget how stiff and wrinkly clothes get on the line. And when the weather's humid, the clothes stay damp for much longer than you'd expect. Nevertheless, once they're actually dry, they have this fresh-laundry smell that you just don't get from a hot dryer. And this handy old-fashioned method saves a ton of energy.
Have you ever line-dried clothes? What do you do to get the wrinkles out? And do you stick with it even through the winter months?
Saturday, June 15, 2013
Two years
Dear blog,
Today you are older and hopefully wiser. (I'm not sure I am.) We've done quite a bit this past year...
Yes, we've branched out past historical cooking. We're still learning from old recipes, but we're also referencing the past more loosely, imbuing the present with old-fashioned methods, activities, and hobbies. We're visiting old mansions to look at what's survived. And I have to say, I like it.
Today you are older and hopefully wiser. (I'm not sure I am.) We've done quite a bit this past year...
- cooked from recipes from 1967, 1903, and the 1st century AD
- visited Downton Abbey through Victorian and Edwardian recipes
- analyzed nutrition, 1900-style
- fallen in love with making ice cream
- canned tomatoes
- gotten nostalgic with old family photos
- harvested from my kitchen garden
- planned and started a new garden
- made some tasty grown-up drinks
- explored the impact of Christopher Columbus and the first Thanksgiving
- gone maple sugaring with my parents
- visited old houses, gardens, and estates
Yes, we've branched out past historical cooking. We're still learning from old recipes, but we're also referencing the past more loosely, imbuing the present with old-fashioned methods, activities, and hobbies. We're visiting old mansions to look at what's survived. And I have to say, I like it.
I'm excited to see what this coming year will bring. Thanks to our wonderful readers, as always, for following along. You make it so much more fun!
Love,
Abby
Wednesday, May 29, 2013
How to render suet for cooking
Back when I first started this blog, I learned a few things right away about historical cooking. First, some old recipes are very similar to their modern counterparts (like pie). Second, animal fat is wonderful. From salt pork to lard, it's all delicious.
Lard may have fallen out of favor with the onset of fat-free food, but used sparingly, it can make all the difference in a recipe. It gives pastry dough that beautiful flaky texture, and it adds depth to dishes when used to grease pans before cooking or baking. Historical cooks knew this well, since they didn't have margarine or canola oil at hand (though butter was a delicious alternative). Today, it turns out there's a small but thriving population of cooks who use (and talk about) animal fat regularly, including those paleo enthusiasts who only eat what our hunter-gatherer ancestors would have eaten. (We're talking waaay back when.)
You can substitute butter for animal fat in most historical recipes, but if you'd like to see what all the fuss is about, you'll need to prepare the fat. Alas, this was a hard-learned lesson for me, one that explains why I had so much trouble making those delicious apple turnovers a few years ago. But you, ah! dear reader, you can benefit from my experience.
First, you need to find out what kind of animal fat you're dealing with. In the United States, you'll most likely wind up with one of two kinds:
- Suet, or raw beef or lamb fat
- Lard, or pig fat (can be rendered or not)
Rendering fat refers to processing "waste" animal products, like the fat around kidneys (suet), into an edible form. If you look at raw suet, you'll see why: it's stringy and piece-y, and hard to work with. You need to cook it and remove the sinews in order to use it. (Whereas I just worked in bits of raw suet to the turnovers...a difficult enterprise.) Here's what to do:
1. Chop the suet or lard into small dice, removing as many sinews and tissues as possible.
2. Place a heavy Dutch oven over medium-low heat. Pour in enough water to cover the bottom of the pot, and place the diced fat in the pot.
3. Heat, stirring occasionally, until the fat has completely dissolved into something that looks like oil and there are little browned bits floating around in it. Time varies wildly; it took me about an hour and a half to render 1/4 lb of lamb suet, but that's also because I had to start over.
4. Strain through a cheesecloth to remove all the browned bits.
5. Store in a jar or other container and let harden, then refrigerate indefinitely.
Then try it out in your favorite recipe and see what you think. It's different! Do any of you cook with animal fat? What do you like about it?
Monday, April 15, 2013
Spring greening
Ah, spring! When a young lady's fancy turns to...plants?
Yes, it is all plants, all the time around these parts. When Josh and I go for a walk, I coo over the tiny purple stars blooming in the myrtle. I envy the flocks of daffodils cheering up the still-drab grass. I tend lovingly to the starts toughening up under my grow light.
Now that the weather is warming up, I'm slowly getting the plants ready to go outside. This is a process called hardening off, and you have to take the plants outside in the sun over a period of days, letting them stay out longer each time to get used to wind, sun, and fresh air. I've also started moving some of the biggest starts into actual containers for the official growing season. (You can see the results of using Cow Pots below--the roots just grow right through the pots!)
And perhaps the most exciting news around here is that I got permission from our landlords to spruce up the yard! I've been busily drawing up plans and completing soil tests to prepare the yard for planting. Because we live in an old house (danger of lead) and the yard isn't huge, I'll be sticking with the container plan for my edibles and planting only ornamentals in the actual yard. But it's still tremendously exciting. Plus, it gives me more of a reason to admire other people's plants...right?
Labels:
activities,
dreams,
gardening,
homesteading,
kitchen garden,
spring,
vegetables
Friday, March 8, 2013
Starting seeds
I ordered seeds from Fedco and Vesey's, two small-batch, cold-weather plant vendors recommended by Henry Homeyer. Both are great because their plants are bred to withstand northerly climates, and Fedco sends a limited number of seeds. This way I don't feel guilty for wasting seeds. In the end, I may have gone (slightly) overboard for my modest container garden, but they all looked so good! Two small packages arrived with the seeds a week later, and I looked through them longingly as I waited for the right planting day.
The last frost for Rhode Island lands somewhere between March 30 and April 30 (specific, I know). I decided to start the earliest seeds (4-6 weeks before the last frost) over the weekend, and I spent a lovely few hours setting up my grow light and arranging pots and growing material.
This year I'm trying out Cow Pots, these super-environmental seed starter pots made of composted cow manure. Once the seeds are ready to transplant, you simply put them in the planting medium, pot and all, and the pots gradually degrade while giving your plants a jolt of natural fertilizer. They sounded awesome, and they (barely) smell at all. Josh was wary, but so far he hasn't complained.
Here's what I planted:
- sweet peppers
- hot peppers
- spinach
- lavender
- cosmos
- sugar snap peas
- tomatoes
- lobelia
My sown seeds are now sitting patiently under the grow light, and I may or may not be excitedly checking them at least twice a day for progress. No signs of life yet, but it's early days. If you're planting a garden this year, have you started seeds yet? What are you growing?
Labels:
activities,
gardening,
homesteading,
kitchen garden,
spring,
vegetables
Thursday, February 28, 2013
Maple sugaring (II)
Last week I wrote about my family's maple sugaring tradition. Today I'll add an amendment: while we love most of the maple sugaring process (tapping trees, collecting sap, boiling it down in the evaporator), we have a hard time with one part: finishing the syrup.
This is the part where the syrup has been boiled to the right consistency, but you have to filter out the minerals and sediment in order to package it. First you heat up the syrup to the boiling point, and then you run it through a wool filter. It's a long and slow process, mostly because the syrup gets all gummed up in the wool filter (what with residue and all that). Once you finally have enough syrup, you have to heat it up again in order to hot-pack it. Still, this is nothing more than filling fresh pint or quart bottles and sealing with a special cap. It's much less involved than canning.
So yes, my family loves one long and slow process (boiling), but somehow we can't make ourselves love another long and slow process (filtering). I know, I know. The idiosyncrasies of the human mind!
As a result, we've made syrup for years without going through that final step. Since the syrup's never been hot-packed, we have to keep it in the freezer. So we have a freezer full of maple syrup.
Ah, problems.
Just before I flew back to Rhode Island, my dad and I spent an afternoon and evening filtering and packaging a few quarts of syrup. We discovered it's best to do this when you can walk away for a while; that way, the intensely slow drip of the filter won't drive you completely insane. In fact, it was actually kind of fun.
But while this process may seem extremely old-fashioned and back-to-the-land, it's actually a "modernized" version of the earliest maple sugaring. The Chippewa and other Northeastern Native American tribes were the first to harvest maple syrup, long before the Europeans set foot in North America. The Chippewa collected sap in much the same way as we do--a makeshift spile let sap drip into a bucket, and it was boiled until syrupy--but they created a different end product. Instead, they turned most of the syrup into granulated maple sugar, which was more easily stored throughout the year. By working the syrup in a special trough, they could turn it into fine granules that were then stored in birch bark containers. The Chippewa drew on this store throughout the year for ceremonies and special meals.
No matter which way you finish, maple sugaring is a labor-intensive process that shows you where your food comes from, beginning to end. And that's something to savor.
Labels:
activities,
canning,
family,
history lesson,
homesteading,
maple syrup,
ohio,
spring,
winter
Thursday, February 21, 2013
Maple sugaring
In our family, February and March are the maple syrup months. Temperatures dip to freezing at night and warm up during the day, so the sap runs easily from the trees. Evenings are spent out in the sugar shed, boiling sap down to golden syrup in a gas-heated evaporator. On weekends, we enjoy pancakes with maple syrup fresh from boiling.
My parents started this grand maple sugaring experiment the year I was born. Initially it was a small operation: one or two taps in the trees, yielding just enough sap to boil on the stove. My dad reminisces wryly about the time he forgot the sap on the stove while he was painting the nursery, and the pot boiled over into a sticky, burnt mess. Since then the project has slowly grown. My dad transitioned to a secondhand evaporator (a channeled metal container that heats up the sap evenly), and we invited my first-grade class over on a field trip. (Fifteen little first-graders standing very close to a hot metal evaporator...there was at least one melted winter jacket.) We helped tap trees and ate cornbread with fresh maple syrup.
After we moved to a new house, the improvements continued: refined heating apparatuses, a new evaporator, special sets of plastic bags to collect the sap. We've visited bigger farms during Maple Madness, Northeast Ohio's maple sugaring festival (yes, it's that big here). We've seen a huge farm that collects sap via plastic tubing, with special machines that jump-start the boiling process; we've shyly toured an Amish operation that heats entirely with wood. There are so many options for processing sap, and yet there's nothing I love more than our own.
Labels:
activities,
family,
homesteading,
maple syrup,
ohio,
spring,
winter
Monday, February 18, 2013
Staying warm
I flew back home to Ohio on Saturday night, and after staying up far too late talking with my parents, we discovered that the house had its own welcome-home present to offer: a broken furnace. Plus, Northeast Ohio was going through a cold snap...which meant the temperature could get down to a bracing 3 degrees F at night.
Adventure!
My dad quickly took charge, being the engineer and all-around handyman of the family. He soon learned that we couldn't get the part needed to fix the furnace until Monday morning, so we would have to wait out Sunday in an increasingly cold house. He and I trekked out to Sears to purchase three oil-filled space heaters, which took all of five minutes to set up and plug in. We couldn't light a fire in the fireplace because the heat would actually suck warmth out of other parts of the house. (If we had a wood stove, that would be a different story.) So we all bundled up in sweaters, vests, and blankets, and turned on the faucets to keep the pipes from freezing. But we had a bracing day. As my mom pointed out, while trying to warm up her hands after scrubbing pans in very cold water, "I think this is how you get chilblains!"
The repairman just left, so our furnace is up and running again. And all in all, we weren't that uncomfortable. But this adventure made me wonder how people warmed themselves in the past. So I did some research, and here's what I found:
- A roaring fire in the fireplace was the best way to stay warm in colonial America.
- When it was time for bed, you could take the warmth of the fireplace with you by filling a warming pan with hot coals and snuggling it under the covers.
- If there were cracks in your cabin, you could dab on some clay to keep the wind (or snow!) from whistling in.
- In the 17th, 18th, and even 19th centuries, folks took foot stoves with them on frigid carriage rides or to church on Sundays. They were basically boxes filled with hot coals. You could also take a hot stone with you if you were poor.
- Layer! Long underwear, woolen petticoats, thick stockings, and quilts all kept the chill out.
Personally, I'd kind of like to have a warming pan to take to bed on chilly nights. What about you? How do you keep warm in the winter?
Labels:
adventure,
history lesson,
homesteading,
lessons learned,
winter
Monday, January 28, 2013
Planning the garden
I don't want to get all cheesy on you guys and talk about new beginnings and whatnot, but with January being so gloomy, it's hard not to dream about a fresh start. And since I'm in the middle of a crash-course fresh start at school, I've been thinking about beginnings in other areas of life, too. Lately of the green variety: the garden.
Last summer I tried out container gardening for the first time, ambitiously calling it my "kitchen garden." There were tomatoes, spinach, snap peas and lettuce. The squirrels probably enjoyed more of its bounty than I did. And yet there was something so satisfying about growing a tiny garden from start to finish. I watched my little seedlings obsessively, bending down to check on them every morning, and when they moved to bigger containers I stuck my finger in the soil every few days to make sure they had enough water. My dad and I traded tips on growing the best tomatoes. When autumn arrived and it came time to clean out the pots for next season, my heart ached a little bit.
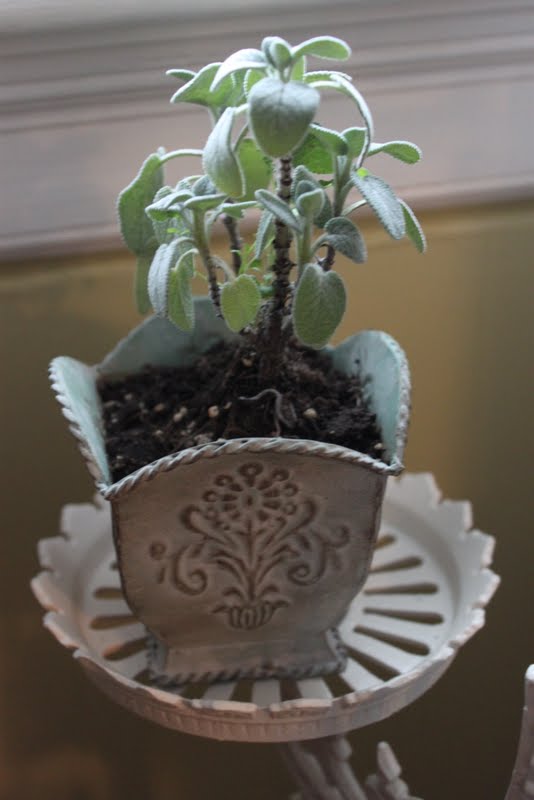
But! Now it's time to plan for this coming season. I've hunkered down in the dining room with library books and an organic gardening text recommended by a friend. I'm taking notes on what plants to grow together and what seeds to order from catalogs. And over the weekend I fell for a few pots of herbs at the farmers' market, because who wouldn't? They now sit on my great-grandmother's plant stand in the living room.
So here's my tentative plan, in containers once again:
- snap peas
- peppers
- kale and spinach
- carrots
- herbs: parsley, sage, rosemary, and thyme (try growing those together without breaking into song); lavender, oregano, cilantro, and dill
- flowers, just because
Ambitious? Yes. Doable? Uncertain. But planning the garden makes January a little less gloomy, and there's something to be said for that.
Are you planning a garden? What will you plant?
"Field Notes" notebook: Column & Stripe.
Monday, January 14, 2013
Old-fashioned remedies for everyday illnesses
![]() |
| hyssop |
Anyway, last week my mind turned to medical treatments more...traditional than taking a dose of Tylenol Cold every 4 to 6 hours. What would those early settlers do when downed by illness? (You knew this was coming.) So I flipped through the handy American Frugal Housewife (1833) to find out the answers. Curl up in a blanket with your hot water bottle and honeyed tea and read on.
For the common cold:
- "A syrup made of horseradish-root and sugar is excellent."
- "Water-gruel" with onions, butter, pepper and salt, consumed just before bedtime.
- A tea to cure "inveterate coughs" can be made with colt's-foot and flax seed (if you can get past the texture).
- Drink a mixture of sugar and brandy to cure a sore throat.
- Mix half a spoonful of citric acid, "which may always be bought of the apothecaries," with half a glass of water.
- A complicated concoction of saffron, myrrh, aloes, and rum. It sounds like it would take longer to make the cure than to wait out the digestive troubles.
- A variety of teas made from "succory" (chicory) or "elder-blow" (the elder plant).
- Wine whey, a mixture of milk curdled with wine. Please note that you can make it "palatable with loaf sugar and nutmeg, if the patient can bear it." Perhaps the cure is worse than the disease?
- Milk porridge, made with boiled milk and flour. Again, nutmeg can help the medicine go down.
- A combination of table-salt and vinegar, dissolved in boiling water.
- Burnt cork, crushed and mixed with brandy, sugar, and nutmeg.
While these are just a few of the many, many complaints and treatments addressed in The American Frugal Housewife, I was struck by the fact that most of the remedies tried to cure dysentery. And that's not a common illness in 21st-century America. It takes me back to the days of playing "Oregon Trail" more than anything else: the dreaded screen reading "You have died of dysentery." But there's a reason so many players died of dysentery in "Oregon Trail:" it could be a life-threatening illness in the days of early settlers, as the Frugal Housewife suggests.
So I'm going to count my blessings that I have nothing more than a common cold. And that I don't have to drink burnt cork.
*Credit: Lissa.
Image: Botanical.com.
Tuesday, December 11, 2012
5 ways to reuse Mason jars
Over the weekend Nina came over and we had another canning extravaganza (Cabernet Sauvignon jelly and pear & ginger preserves, for the curious). It's much more fun, and efficient, to can with another person, especially if you both prep your mixtures in advance. That way you can just reheat the jelly/preserves/jam on the stove while the water bath heats.
(We're thinking these will make excellent holiday presents.)
While they were in town on Saturday, Josh's parents were kind enough to give me this nifty journal (left) for logging all my canning adventures. Our previous goods will certainly make the cut, and I'm looking forward to filling up the journal with notes and photos of jewel-like preserves.
But the journal's cheeky cover got me thinking: what does a thrifty person do with all those leftover jars? Back in the homesteading days, no self-respecting cook would let those jars go to waste. Thankfully, we've got an abundance of crafty supplies and inspiration these days to make Mason jars even more useful. Here are 5 ideas:
1. Make a mini-terrarium. You'll want to layer in stones, a bit of sphagnum moss (both for drainage), potting soil, and tiny plants of your choice (or green moss). Spritz with water and set in moderate light (I have a few on my kitchen windowsill).
2. Store matches, buttons, or any other odd and end. I poured liquid dish soap into some old jars when the plastic container broke, and the jars make for a much prettier sink display.
3. Create an easy candle holder: wrap ribbon around the outside of the jar with a bit of glue and place a tealight inside.
4. Make mini-snow globes. Ever since Anthropologie came out with rather pricey Mason jar snow globes, the craft blogosphere has been buzzing with DIY instructions. I made mine this way: glue a craft tree to the underside of a jar lid. Spread a thin layer of glue on the rest of the lid's underside and sprinkle with buffalo snow. When the glue has dried, pour a small amount of buffalo snow (and glitter, if you like) into the jar, and carefully screw the lid back on the jar. The snow will spill a bit, but if you lay down newspaper you'll end up with a minimal mess.
5. Reuse your jar to preserve something else! You can reuse the jar and the ring--all you need to do is replace the flat lid with a new one (the seal needs to be fresh).
If you have any crafty ideas for reusing Mason jars, I'd love to hear.
Tuesday, October 30, 2012
Canning: Apple butter
We're safe and sound here in Providence. The hurricane swept through yesterday and we stayed snug in the apartment, catching up on schoolwork and relaxing. There were several hours of Diablo III (Josh) and of baking cheesy pull-apart bread (me). There was an evening of catching up on our favorite shows and watching The Adventures of Tin-Tin. And today the weather's clear and sunny, but we're still off from school while Rhode Island pulls itself back together.
Just like last year when Irene stopped by, we were extremely lucky not to lose power or face flooding. These two days off from school have been more like surprise snow days (minus the snow) than anything scary, and I'm thankful for that.
If you're still battening down the hatches to weather out the rest of the storm, or if you're just hankering for a comforting, homey taste of fall, might I suggest some apple butter? Freshly made over the weekend, this apple butter spiced up my morning oatmeal and kept me warm long into the day while the wind screamed outside. It's just what I needed to get ready for the colder months ahead.
I adapted this recipe from Liana Krissoff's excellent Canning for a New Generation, so it's not technically a historical recipe. Krissoff helps you bypass the labor-intensive parts of making apple butter the traditional way, allowing you to slow-cook the butter in the oven instead of stirring it constantly on the stove. Still, the hours spent in the oven imbue this apple butter with a spicy, old-fashioned goodness. Once the apple butter was thick and dark, Nina came over to help pack it up in half-pint jars. (This canning thing is becoming a habit of ours.) We also put up some applesauce she'd made the day before, and we ended up with a pretty decent haul. If we don't hoard our cans all winter long (trust me, it's tempting), we're thinking they'll make excellent gifts come the holidays.
Stay safe, friends, and help yourself to some apple butter.
Do you have any tips for making it through storms and snow days? I'd love to hear.
Apple Butter
(adapted from Canning for a New Generation by Liana Krissoff)
makes between 6 and 10 half-pint jars
6 lbs apples, peeled and cored and chopped into small pieces (I used a combination of Macintosh and Granny Smith)
2 cups apple cider
roughly 1 1/2 cups brown sugar
1 1/2 tsp ground cinnamon
1/2 tsp ground cloves
1/2 tsp ground allspice
Put the apples in a large saucepan, together with the cider and 4 cups of water. Boil over high heat, stirring occasionally, until the apples are mostly mushy and broken down, about 40 minutes. Puree the mixture in batches in a blender until smooth, and measure before pouring it into a medium Dutch oven. Preheat the oven to 300 F.
Into the apple mixture, stir in 2 tbsp brown sugar per cup of puree (this is why you measured it earlier). Stir in the spices. When the oven is hot, bake the apple mixture for about 2 hours, stirring occasionally, until it's thick and dark and the kitchen smells of spice.
If you'd like to can the apple butter (this recipe makes a lot), set a canning pot full of water to boil on the stove. Wash the jars and lids you'll be using, and set the jars in the canning pot to keep them hot. Put the lids in a heatproof bowl and ladle some of the hot water from the canning pot into the bowl to cover the lids.
Remove the apple butter from the oven and set on the stove over medium heat until it's boiling. Once the canning pot is boiling, remove the jars from the pot with a jar lifter and place them upright on a towel. Remove the jar lids from the bowl and set on a plate.
Working quickly, pour the apple butter into the jars, leaving about 1/2 inch headspace in each jar. Place a lid on top of each jar and lightly screw on the ring, so it holds but is still loose. Use the jar lifter to return the jars to the canning pot, making sure they're upright and covered by at least 1 inch of water. Bring the canning pot to a boil and process for 10 minutes. Remove the jars and place on a towel. Check the lids to make sure they've sealed after 1 hour (when you press the center of the lid, it shouldn't push down or pop back up). If any haven't sealed, refrigerate immediately. Don't move the sealed jars for 12 hours. When they've finally cooled, label and store.
Tuesday, September 4, 2012
Canning fruit (II)
Yesterday I recounted how my friend Nina and I decided to can 40 lbs of tomatoes. When I left off, we had just realized how much time (and patience) this project required.
Nevertheless, we persevered. Once the crushed tomatoes had boiled, we started ladling them into our sterilized Mason jars (prepped with lemon juice to prevent evil bacteria from forming. Botulism is no joke).
Then came the fun part: lowering the filled jars back into the boiling water of the canning pot. This is what seals the jars and prevents more bacteria from forming.
After that, we let them all boil for 40 minutes while we maybe talked to them a little bit. Because they looked so cozy sitting together, and it can't hurt to encourage them.
However, by the time the sauce was ready, we had been at this canning project for 5 hours and I had plans for dinner. So courageous Nina finished the project on her own, documenting the final stages for posterity. We haven't counted the jars yet...but suffice it to say, we'll be eating a lot of tomatoes this winter.
![]() |
| photo by Nina |
This adventure reminded me why canning is so special.
- First, you get to preserve the tastiest fruits and veggies from your garden (or your farmer's garden), to enjoy long into the winter.
- Second, it brings people together. My friend Emily first taught me how to can, before I'd started this blogging project and dedicated myself to testing out homesteading methods. We made a batch of strawberry jam, and by the end of the afternoon I was a goner. It seems to be one of those skills that people pass on to one another, through afternoons in the kitchen or community classes. It helps bring people together.
- Third, even if you can by yourself, you can give your gorgeous Mason jars as gifts (see holiday plans above).
- Fourth (you knew this was coming), it's one of the most practical ways of carrying on historical cooking methods.
Intrigued? Want to try it yourself? Emily's written an excellent guide to canning your own jam, and I suggest you check it out if you've never canned before and want to try it.
Labels:
adventure,
books,
canning,
homesteading,
lessons learned,
summer
Monday, September 3, 2012
Canning fruit (I)
Last Sunday, over dinner at our local Ethiopian restaurant, my friend Nina said, "When can we can?" And thus began a rather silly and ultimately fruitful (heh) endeavor of canning 40 lbs of tomatoes. And making lots of canning jokes. ("Yes, we can" is Nina's favorite.)
Canning is a fascinating process. Before refrigeration, it was one of the best ways for home cooks to preserve the bounty of their gardens long into the winter. Now that we can easily freeze leftover fruits and veggies, canning has become more of a fun way to preserve food than a necessity. Plus, along the way it's acquired an exotic sort of aura. Not everyone knows how to can, and the uninitiated tend to see it as a complicated art that requires years of practice. The funny thing is that it's pretty easy. It just takes time, patience, and a strict adherence to directions. Sort of like ice cream.
Here are the basics:
- You prepare your fruit for canning (and yes, tomatoes are a fruit). You can do this however you wish; we used a few recipes from Liana Krissoff's excellent Canning for a New Generation.
- Meanwhile, you should heat up a large pot for processing the cans, and wash the jars and lids you'll be using.
- When the water in the canning pot is hot, you slip the jars in to keep them hot and sterilized until you ladle in the fruit.
- Once you've put the fruit in the jars, you set the jars back into the boiling water of the canning pot to process. This is the part that seals the jars to make them safe for storage.
So it's not such a difficult process. It just takes a lot of pots and pans. And, as we discovered, tomatoes in particular need a lot of time to process. They're finicky fruits, those tomatoes.
Nina and I blithely set out to spend yesterday afternoon putting up tomatoes for the winter. Nina's farmshare gave her an excellent deal on tomatoes, and I picked up a few pounds more to even out the numbers. This meant that we had 40 lbs of tomatoes all together.
40 lbs of tomatoes is a lot of tomatoes, friends. Especially if you've only canned twice before, like me, or never, like Nina. This is the point where we began to worry that the afternoon would resemble an episode of I Love Lucy.
Nevertheless, we soldiered on. We set up our army of pots (my canning pot took up 2 burners alone) and boiling water, and arranged an assembly line to peel the tomatoes and prepare them for cooking. We planned on making tomato sauce, which required 45 minutes of simmering before it could be canned, and crushed tomatoes, which only needed 5 minutes. So naturally we began work on the tomato sauce first.
However, by the time we'd finished peeling and crushing the 24 lbs meant for the sauce, the canning pot was ready for processing (understandably, since it was an hour and a half later). So we decided instead to prepare the crushed tomatoes for efficiency's sake. This took another half an hour of peeling, plus managing which pots would fit on which burners and waiting for the tomatoes to boil. We didn't actually start processing the filled cans until 3 hours into our canning adventure.
And yes, at this point we'd cracked open a couple of beers and I was sighing, "No, we can't."
Would we manage to can all 40 lbs of tomatoes before the end of the afternoon?
Would we lose our minds?
Would we not do it correctly and poison ourselves and everyone we knew with botulism?
Check back tomorrow to find out!
Would we lose our minds?
Would we not do it correctly and poison ourselves and everyone we knew with botulism?
Check back tomorrow to find out!
Labels:
adventure,
books,
canning,
fruit,
homesteading,
lessons learned,
summer
Subscribe to:
Posts (Atom)