Showing posts with label settlement cookbook. Show all posts
Thursday, July 11, 2013
Himmel torte
We just returned from a week in Maine with Josh's family. A gorgeous lake house near the town of Casco served as our home base, and we spent the week swimming, kayaking, reading, and playing games. The men-folk cooked almost every meal on the grill, while the women-folk engaged in some serious salad-making and baking. I even hauled out The "Settlement" Cook Book to make a belated birthday cake. (Yes, I packed it. No, you shouldn't be surprised.)
That week is still on my mind, for the sense of utter relaxation it gave me and for the cooler weather we left behind. And also for the cake I baked. You see, it was kind of a disaster, and I'm still trying to figure out what went wrong.
This was one of those recipes that was devilishly hard to interpret, thanks to its sheer lack of specificity. With the frosting, for example, the only instructions were: "One pint thick sour cream, vanilla, two tablespoons cornstarch and sugar mixed. Boil." How much vanilla? Do you combine one tablespoon each of cornstarch and sugar, or two each? There were no reassuring comments from the cookbook writer, either, telling me not to worry when my cake batter was barely spreadable. As a modern cook, it's frustrating to encounter old recipes that assume you know everything.
So I made some of it up, crowd-sourced interpretations for some of the stranger instructions, and hoped for the best. The resulting cake (ambitiously titled "Himmel torte," or "heaven torte") was flaky and crumbly, but the jam helped hold some of it together. Once frosted, you could hardly tell this cake was a disaster. And once served, it was pretty darn tasty.
I might redo this cake at some point in the future, but for now I'll leave you with the recipe I cobbled together. Try it if you want--it actually turned out okay.
Himmel Torte
(adapted from The "Settlement" Cook Book)
for the cake:
1 1/2 cups unsalted butter (3 sticks), softened
4 tbsp sugar
2 eggs + 2 egg yolks
4 cups flour
grated rind of 1 orange
for the frosting:
about 2 tbsp cinnamon sugar
about 3/4 cup raspberry jam
1 pint sour cream
1 tsp vanilla
1 tbsp flour or cornstarch
2 tbsp sugar
2 egg whites
to make the cake:
Preheat the oven to 350 F. Grease two round 8 x 8 cake pans and set aside.
Cream the butter and sugar together in a large bowl until light and fluffy. Add the eggs and yolks, one at a time, stirring well after each addition. Add the orange rind and flour, mixing gently until just blended. (Use your hands if you have to, and I won't tell.) Spread in the prepared pans and bake at 350 F until a toothpick inserted in the center comes out clean, about 20-30 minutes. Cool on a wire rack.
to make the frosting:
In a medium pan over a medium flame, heat the sour cream, vanilla, flour, and sugar until bubbling. Mix in the egg whites until well-blended and remove from heat. Let cool and move to the refrigerator to set, about 1 hour.
Once the cakes have cooled, turn one layer out onto a large plate. Sprinkle the top with the cinnamon sugar and spread evenly with the raspberry jam. Turn the second layer out on top of the jam. Spread the cooled sour cream frosting on top and sides and serve.
Thursday, June 27, 2013
Devil's cake no. 1
Yesterday I celebrated my birthday! I turned 27, just a few weeks after this blog turned 2. In between melting in the 90-degree heat and dashing through torrential rainstorms (yes, it was an eventful day, weather-wise), I enjoyed a pastry from my favorite bakery, assembled a Settlement birthday cake, and tried out a new restaurant with Josh. I can now say definitively that lots of food-related activities make for one delicious birthday.
Now, let's get serious about this birthday cake. My father loves buying cake. And I mean, he loves it. He buys decorated cakes (vanilla or yellow, with buttercream frosting) from Giant Eagle for every occasion he can think of: birthdays, Mother's Day, the Fourth of July...you name it, he celebrates it. Once my dad even bought a cake to celebrate my birthday when I wasn't even going to be home on the occasion. You get the picture: my family can be depended upon to have a bit of store-bought cake hanging out in the freezer at any given time.
However, I haven't enjoyed Giant Eagle cake since middle school. I'm not sure why, but for some reason the frosting and consistency of the cake just doesn't do it for me. I've tried a few different solutions, like cherry pie (to which my dad cried, "but it's not a real birthday without cake!"), and a marble cake in the hopes that chocolate would be tastier (our dog pulled it off the counter and ate it). Somewhere down the line I gave up and decided that making my own cake would be the easiest solution. But I haven't found the perfect recipe yet.
This year, I tried a recipe from The "Settlement" Cook Book, partly to kill two birds with one baking pan. It wasn't a total success; devil's food cake from 1903 is decidedly less chocolatey than our modern-day palates would like, and the method of making the frosting felt very old-fashioned. But it's still tasty, and a perfectly fine way to celebrate another birthday.
Devil's Cake No. 1
(from The "Settlement" Cook Book)
for the cake:
2 oz unsweetened chocolate
3 tbsp water
1 1/4 cups sugar
1/2 cup butter
1 cup buttermilk
1 tsp baking soda
1 egg yolk (reserve the white for the frosting)
2 cups flour
for the frosting:
1 cup sugar
1/3 cup water
2 oz unsweetened chocolate
1 egg white, beaten
1/8 tsp cream of tartar
1 tsp vanilla
To make the cake:
Preheat the oven to 350 F. Grease two 8-inch round pans and set aside.
In a small pan over low heat, melt the chocolate, water, and sugar together, stirring until dissolved. Add the butter and stir until blended. Remove from heat and let cool.
In a separate, large bowl, combine the buttermilk, baking soda, and egg yolk, beating well to blend. Add the cooled chocolate and beat well. In a few strokes, add the flour until just combined. Pour the mixture into the prepared pans and bake at 350 F for 30 minutes, or until a toothpick inserted into the center of the cake comes out clean.
To make the frosting:
Heat the water in a small pan over medium heat until just boiling, then add the sugar and stir. Once the sugar is completely dissolved, heat the mixture slowly without stirring to the boiling point. Let syrup cook until it forms a thread when drizzled from a spoon, about 20 minutes. Remove from heat and stir in the chocolate until well-blended.
When the syrup is ready, quickly add the cream of tartar to the egg white and beat to combine with a fork or whisk. Add the egg mixture to the chocolate syrup and beat well. Add vanilla and beat again. Let the mixture cool, placing in the fridge if necessary.
When ready to frost, stir the frosting once more. Turn one cake out onto a plate and frost evenly, then place the other cake on top. Spread remaining frosting with a knife or spoon.
Labels:
20th century,
baking,
dessert,
family,
settlement cookbook,
summer
Saturday, June 15, 2013
Two years
Dear blog,
Today you are older and hopefully wiser. (I'm not sure I am.) We've done quite a bit this past year...
Yes, we've branched out past historical cooking. We're still learning from old recipes, but we're also referencing the past more loosely, imbuing the present with old-fashioned methods, activities, and hobbies. We're visiting old mansions to look at what's survived. And I have to say, I like it.
Today you are older and hopefully wiser. (I'm not sure I am.) We've done quite a bit this past year...
- cooked from recipes from 1967, 1903, and the 1st century AD
- visited Downton Abbey through Victorian and Edwardian recipes
- analyzed nutrition, 1900-style
- fallen in love with making ice cream
- canned tomatoes
- gotten nostalgic with old family photos
- harvested from my kitchen garden
- planned and started a new garden
- made some tasty grown-up drinks
- explored the impact of Christopher Columbus and the first Thanksgiving
- gone maple sugaring with my parents
- visited old houses, gardens, and estates
Yes, we've branched out past historical cooking. We're still learning from old recipes, but we're also referencing the past more loosely, imbuing the present with old-fashioned methods, activities, and hobbies. We're visiting old mansions to look at what's survived. And I have to say, I like it.
I'm excited to see what this coming year will bring. Thanks to our wonderful readers, as always, for following along. You make it so much more fun!
Love,
Abby
Tuesday, January 22, 2013
Short cake, with blueberry topping
Over the long weekend, my sister Lissa came to visit, and one afternoon we drove down to New Haven, CT, to visit our old college. We toured the British Art Gallery and I found time to wander around Yale's campus with my camera, snapping photos of old haunts and sun-drenched architecture.
I don't know how many of you feel this way about your college, but I can never visit Yale without being flooded with memories. There's the window of the suite I lived in freshman year, where my suitemates and I sang songs and threw water balloons. Here's the cathedral-like library, where I huddled away in the stacks and breathed in the smell of old books. This is the route I walked once or twice a week to the literary magazine where I worked for three years. Those are the carillon bells that rang out across campus at 5 each twilight afternoon when my friends and I walked to the dining hall for an early dinner. This is one of countless booths my friends and I colonized during Saturday night pizza outings.
There's a lot of sadness wrapped up in this place for me, because of all the hard things I had to learn in college. And because my friends are now scattered across the country, and we get together once a year (at most) for weddings. People say that college can be some of the best years of your life, but they don't tell you that once it's over, you might need several years to get over the crushing blow of graduation.
But I'm grateful, too, for everything I learned here, both in history lectures and in the echoing corridors of my residential college. In some ways I feel like I'm still a college student, figuring things out for the first time on my own, and in some ways I feel so much older. In a good way, like I'm finally starting to settle into my place.
Lissa and I talked about how in some ways, the student body hadn't changed at all since we were there. We ran into teams decked out in sports apparel, the fashionable girls in skinny jeans and boots, the international students wearing pea coats and college scarves. A lot of other things had stayed the same, too, from the architecture to the restaurants we loved. But we could see changes, too--a frozen yogurt place had taken over an old bookstore, a Shake Shack replaced a restaurant I didn't remember. This place is changing and adapting, and we were, too, though we may not have even realized it at the time.
And I think it's time to make a change around this little blog, too. In the months to come, I'll be expanding the blog to encompass other aspects of building a simple life inspired by history. I'll still chronicle my cooking adventures, but I'll also explore other topics that have been on my mind. In that spirit, here's a biscuit recipe pulled from The "Settlement" Cook Book, with a topping inspired by a much more recent cookbook, All Cakes Considered. Sometimes, a fusion of foods both past and present can be just the flavor you need.
Short Cake with Blueberry Topping
(adapted from The "Settlement" Cook Book)
for the short cake:
2 cups all-purpose flour
3 tsp baking powder
2 tsp sugar
1/2 tsp salt
1/4 cup unsalted butter, cubed
3/4 cup milk
for the blueberry topping:
1/2 cup brown sugar
1/4 cup water
1 cup blueberries
to make the short cake:
Preheat the oven to 425 F. Sift the flour, baking powder, sugar, and salt in a medium bowl. With your fingers, rub the butter into the flour mixture until combined and the mixture resembles the texture of cornmeal. Add the milk and stir until just combined. Turn out onto a floured board and roll to 1/4 inch thickness. Cut into rounds with a biscuit cutter or measuring cup. Layer one round on top of another to create a 2-layered biscuit, and place each biscuit in a buttered pan. Bake for 12-15 minutes or until golden brown.
to make the blueberry topping:
Meanwhile, mix the brown sugar and water in a small saucepan over medium-low heat. When the sugar is completely dissolved, pour the blueberries into the pan and mix well to cover with sugar syrup. Bring to a boil and then lower the heat to simmer the mixture, stirring occasionally, for 15-20 minutes. Take the mixture off the heat when most of the blueberries have broken down.
Split each biscuit in two and drizzle blueberry topping on one round, placing the plain round on top. Drizzle more blueberry sauce on top, or sprinkle with sugar.
Labels:
baking,
college,
dessert,
fruit,
lessons learned,
settlement cookbook
Wednesday, December 5, 2012
How I blog (plus potato pancakes)
I'd like to pretend all my blog posts and series spill out onto the computer fully-formed. But like most of my writing, creating blog content is a slow, careful process. There's a lot of planning, rewriting, deleting, and then some more rewriting. Sometimes it's painful. Sometimes I'd rather take pretty pictures or read other people's effortless-looking blogs or go for a walk.
So, inspired by Joy the Baker's admirable honesty, today I'm going to give you a glimpse behind the curtain. This is how I made potato pancakes yesterday...and all the thinking and research that went into it.
Two Days Prior (Inspiration Time)
I start thinking about what I could make for the blog. I glance longingly at my pile of cooking magazines and the exciting East-West blend of Simply Ming that I got from the library. If only I could count Thai green curry sauce as historical. I suppose I could...if I knew more about Thai history and cooking.
Note to self: new blog series!
Then I talk myself down from starting yet another massive research project. I flip idly through The "Settlement" Cook Book and mark some cookie recipes. But Josh and I made Christmas cookies over the weekend, and we definitely can't eat them all plus more cookies. (Here Josh would say: "But, delicious!") So I read Bon Appetit instead.
![]() |
| inspiration! |
One Day Prior (Research Time)
Adam Rapaport's article on the perfect latke makes my mouth water. I love potatoes. When a friend hosted a supper club several months ago, she and her sister waxed poetic about how potatoes would definitely be included in their last meals. I firmly agree. There is nothing like the potato.
Perhaps there's a similar recipe I could make for the blog. I flip through The "Settlement" Cook Book again, and lo and behold, there's a recipe for potato pancakes! And I could probably think of a good angle for the post...
But today we have leftovers, and I am fighting a cold that makes me feel like death warmed over. So I'll wait. I eat my pasta and imagine it tastes like potatoes.
(Can you tell I have an issue with leftovers? And that I was raised in a good Midwestern family with lots and lots of a certain root vegetable?)
Day Of (Cooking/Photo Time)
| potato pancakes, posing with applesauce |
My cold has significantly improved, and I leave school bounding with energy. When I get home I set up my equipment: ingredients, box grater, kitchen towel, fry pan, and of course, CD player. I'm going through a phase where I listen to dramatized Agatha Christie mysteries while I cook...it lends the whole enterprise an air of drama.
The Settlement recipe doesn't provide much in the way of guidance, so I open up Bon Appetit and skim the latke article. Rapaport recommends squeezing the grated potatoes to rid them of excess water--this sounds like a good idea. Then I make assumptions about the other instructions, based on what I know about frying up regular pancakes. I cut the ingredients from the Settlement recipe in half (it's only Josh and me, not our turn-of-the-century family of six) and get to work. The light's dying, so I do it quickly, hoping to get some decent natural-light photos in before the day ends.
But that's not to be, so I set up my kitchen table with seasonal linens and turn on the lamp for additional lighting. I spend the next ten minutes or so taking glamour shots of fried potato cakes.
One Day After (History Time)
![]() |
| New York settlement cooking class |
Before school starts, I glance at the Wisconsin Historical Society's website for a reminder about the Milwaukee Settlement. I did the majority of my research for this project when I first started using the book, so most of this is familiar. But I want to confirm my suspicions that this recipe is for German Jewish potato pancakes, rather than for those of another culture. And indeed, I find that Lizzie Kander, the writer of The "Settlement" Cook Book, taught Jewish women how to cook at the Settlement, so I'm fairly certain that these potato pancakes could have been used in a turn-of-the-century Hannukah celebration.
So I gather my historical photos from more or less reputable sources, upload my own photos, and type up my thoughts. Plus the recipe, which is adapted heavily from the original (i.e. with actual measurements).
As you can see, it's a messy, time-consuming process. I'm sure many of you have developed much simpler ways of creating blog content, or perhaps you have your own elaborate methods. I'd love to hear!
Potato Pancakes
(adapted from The "Settlement" Cook Book and Bon Appetit's December 2012 issue)
4 russet potatoes, peeled
1/2 tsp salt
1/4 tsp baking powder
2 tsp flour
1 tbsp milk
2 eggs, beaten
vegetable oil, for cooking
Using the larger holes on a box grater, grate the potatoes. Dump the potato mixture onto a clean kitchen towel, wrap up the mixture, and carefully wring out the liquid over the sink. You may want to do this twice. Mix the dried potato gratings with the salt, baking powder, flour, and milk, and add the eggs at the end.
Heat a large skillet over medium-high heat, and pour in enough oil to cover the bottom of the pan. When the oil shimmers, drop the potato mixture in by spoonfuls and flatten with the back of the spoon. Cook about 4 minutes, or until brown and crispy, then carefully flip over the pancakes to brown on the other side, about 3-4 minutes. Remove cooked pancakes to a plate lined with paper towels.
Serve with applesauce.
Works cited: 1. Bon Appetit Magazine. 2. Elizabethian Tea.
Labels:
honesty,
pancakes,
potatoes,
settlement cookbook,
vegetables
Wednesday, November 28, 2012
Candied orange peel (with chocolate)
Thanksgiving is over. The turkey's been roasted and eaten (or perhaps you tried a duck?), the festive harvest plates have been washed and put away for another year. And now everything in America is telling us it's time for the winter holidays: the pharmacies selling mechanical Santas, the radios playing nothing but Elvis, the twinkle lights and pine garlands draping storefronts.
It's all going a little too fast for me. How is it the holiday season already? We just got into fall! (It doesn't help that my school is rehearsing and producing a play in the three weeks before winter break. December's going to go like lightning.)
I like to move slowly into winter, preferably with something delicious to ease the transition. There's hot chocolate, of course, and mulled wine (more on that soon). But lately I've been craving something tangy, a treat with zip.
This candied orange peel fits the bill. I first learned how to make it a few years ago when my mom decided to bake stollen, a traditional German holiday bread studded with dried and candied fruit. Her grandmother (intimidatingly nicknamed "TuTu") used to bake stollen every winter, and my mom decided that she was ready to take on the baking challenge. So we spent a long, cozy morning cutting up oranges and simmering the peel in a thick syrup, then chopping those candied peels to mix into the bread. It was one of those lovely surprises of the holiday season, when you learn that your parents have these hidden traditions they never told you about.
Personally, I prefer the candied orange peel just as it is, maybe with a bit of chocolate to really make it decadent. The French call these chocolate-dipped gems orangettes, and you can learn more about them from Molly Wizenberg's blog of the same name. They're shockingly easy to make. And they're just the thing to wake up your senses as you settle into a long, cold winter.
Candied Orange Peel (Orange Sticks)
(adapted from The "Settlement" Cook Book)
1 orange, scrubbed
1/2 cup plus 1 tbsp granulated sugar, divided
1/4 cup hot water
optional: 1/4 - 1/2 cup semisweet chocolate chips
To make the orange peel:
Score the orange lengthwise into four sections. Carefully remove the peel from the orange, making sure to keep each section in one piece. You should have four sections of peel. Carefully cut each section into narrow slices, about 1/4 inch wide.
Place the slices in a medium saucepan and cover with water. Bring to a boil, then drain off the water. Repeat process four more times. This will blanch the bitterness from the orange peel.
Set aside the orange peel. In the same saucepan, mix 1/2 cup of sugar and the hot water and cook over low heat, stirring often, until sugar is dissolved. Place the blanched orange peel back in the pan with the simple syrup and stir to coat. Cook over low heat, stirring often, until the syrup is mostly evaporated, about 20 minutes.
Remove the orange peel from the saucepan and drain off the excess syrup (or pour it into your tea, as I did). Sprinkle the remaining tbsp of sugar over a flat surface and carefully roll the orange slices in the sugar, using tongs or a spoon, until coated. Place on a wire rack to cool.
For chocolate dip:
Melt the chocolate chips in a double boiler over medium-low heat. When the chocolate is just melted, dip the ends of the orange peel in the chocolate. Let cool on a piece of wax paper. 1/4 cup of chocolate chips will be sufficient for about half the slices.
Monday, November 5, 2012
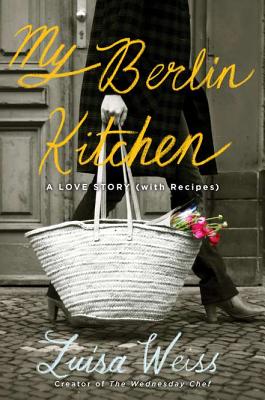
Luisa Weiss' My Berlin Kitchen
You know how there are books that grab you from the first page? You think to yourself, This is me. I see myself in this story. This was my experience with Luisa Weiss' memoir My Berlin Kitchen. I was so enthralled that I actually read the book as slowly as possible rather than zipping through it, in hopes of soaking up every word and turn of phrase.
Weiss is the creator of the popular Wednesday Chef blog, and in this memoir she recalls growing up in Boston and Berlin, splitting time between her divorced parents. Her childhood gave her a perpetual sense of homesickness, and as she learned her way around a kitchen, she began cooking as a way to reconnect with the people and places she loved. She writes simply and beautifully about trying to find her way in the world after college: her difficulties living in Paris, settling down to a publishing job and a fiance in New York, only to realize that she really wanted to be back in Berlin, where her life began. With incredible courage she said goodbye to her fiance and returned to Berlin. There she rekindled a relationship with Max, a former love who truly understood how torn she was between cultures.
My Berlin Kitchen tells a sweet and heartfelt love story, but at its core it's about belonging and how food can help create a sense of place. I recognized Weiss's decision to make Depression Stew when she felt so alone in Paris, a sort of home remedy against loneliness. I smiled at her dilemma over what to make for breakfast--cereal, pastries, or open-faced sandwiches? (Though my dilemma is not brought on by a jet-setting childhood, merely the inability to choose between so many delicious options.) And when she bought a goose for her first full German Christmas, I cheered along with her when she roasted a perfect bird.
Sometimes I feel torn between my Ohio hometown and my adopted home on the East Coast, and I've spent plenty of time working out strategies to prevent homesickness in one city or the other. My first year out of college, spent in New York City, was particularly brutal. But like Luisa Weiss, I found that cooking actually helped assuage some of that loneliness. For me it was less about recreating the tastes of home and more about keeping myself company; I could put on a DVD and cook an elaborate dinner, just for fun. Since I've started this blog, though, I've been discovering the ties between family and food. Baking a pie will remind me of my dad's stories about exploding pumpkins, or frying fish will make me think of my grandmother's careful instruction on gutting fish. Making something delicious in the kitchen can bring you closer to the people you love.
I had the great pleasure to see Luisa Weiss in person when she did a book signing in Boston, and she's just as charming and genuine as her writing. If you have a chance to pick up her memoir, do. It's one of the best books I've read all year.
(Plus, she learned how to cook by working her way through The "Settlement" Cook Book, and she grew up reading Little House on the Prairie! It's kismet.)
Weiss is the creator of the popular Wednesday Chef blog, and in this memoir she recalls growing up in Boston and Berlin, splitting time between her divorced parents. Her childhood gave her a perpetual sense of homesickness, and as she learned her way around a kitchen, she began cooking as a way to reconnect with the people and places she loved. She writes simply and beautifully about trying to find her way in the world after college: her difficulties living in Paris, settling down to a publishing job and a fiance in New York, only to realize that she really wanted to be back in Berlin, where her life began. With incredible courage she said goodbye to her fiance and returned to Berlin. There she rekindled a relationship with Max, a former love who truly understood how torn she was between cultures.
My Berlin Kitchen tells a sweet and heartfelt love story, but at its core it's about belonging and how food can help create a sense of place. I recognized Weiss's decision to make Depression Stew when she felt so alone in Paris, a sort of home remedy against loneliness. I smiled at her dilemma over what to make for breakfast--cereal, pastries, or open-faced sandwiches? (Though my dilemma is not brought on by a jet-setting childhood, merely the inability to choose between so many delicious options.) And when she bought a goose for her first full German Christmas, I cheered along with her when she roasted a perfect bird.
Sometimes I feel torn between my Ohio hometown and my adopted home on the East Coast, and I've spent plenty of time working out strategies to prevent homesickness in one city or the other. My first year out of college, spent in New York City, was particularly brutal. But like Luisa Weiss, I found that cooking actually helped assuage some of that loneliness. For me it was less about recreating the tastes of home and more about keeping myself company; I could put on a DVD and cook an elaborate dinner, just for fun. Since I've started this blog, though, I've been discovering the ties between family and food. Baking a pie will remind me of my dad's stories about exploding pumpkins, or frying fish will make me think of my grandmother's careful instruction on gutting fish. Making something delicious in the kitchen can bring you closer to the people you love.
I had the great pleasure to see Luisa Weiss in person when she did a book signing in Boston, and she's just as charming and genuine as her writing. If you have a chance to pick up her memoir, do. It's one of the best books I've read all year.
(Plus, she learned how to cook by working her way through The "Settlement" Cook Book, and she grew up reading Little House on the Prairie! It's kismet.)
Thursday, October 4, 2012
Sardine sandwiches
Yep, you read that right.
As you may recall, I'm one of those weird folks who actually enjoy foods deemed disgusting by many Americans: anchovies and sardines, in particular. Anchovies don't just add a unique umami flavor to pasta sauces and Caesar dressing, they make a delicious topping for white pizza, too. Unfortunately, few people in my life agree. So it's always exciting to find someone else who enjoys salty, oily canned fish; it's like a special club made up of friends you'd never expect to know.
Like my freshman suitemate's grandmother.
My living situation freshman year of college was...well, interesting, as is the case with basically all college freshmen. My college arranges students in suites, which are made up of a few bedrooms (single or double) all connecting to a common living room. So instead of getting to know just your roommate really well, you also get to know four other suitemates pretty well, too. And since you don't have much of a say in who these suitemates are, you end up in one of three situations: becoming best friends; hating each other; or being surprised every day with unexpected stories and experiences.
Mine was definitely the latter, courtesy of my suitemate Charysse.
Charysse had a single, and she kept to herself for much of the first month of college. We all did, when we weren't sticking like glue to the few friendly people we found. (My roommate Daena and I pretty much went everywhere together.) But around October, something changed, and Charysse started spending more time with us in the common room, and we got to know each other real fast. Charysse posted her graded chemistry lab reports up on the walls, because she goaded her TA with ridiculous conclusions comparing the study of chemistry to the study of love. The TA responded with outraged comments, which made for excellent posters. Charysse also led us in afternoon singing sessions, which she taped on a little hand-held recorder. We discovered a shared love of Led Zeppelin and rocked out to Kashmir on quiet weeknights. It was one of those friendships that can only develop in college, when you're thrown together with people you wouldn't normally get to know. You discover how much you actually have in common with them.
![]() |
| Jacques Pepin Celebrates! (actual poster from PBS) |
But the strangest package was the one with the sardines. Her grandmother sent some big cans of sardines, along with a few other items that I can't recall. And after a long discussion of what this latest gift meant, Charysse opened up the cans and ate the sardines. I don't remember if I joined in--this was early on in my anchovy-sardine career, and I may not have even tried them by that point. But something about those little fishes nestled in their tin packet of oil appealed to my adventurous side. And I mentally added sardines to my list of approved foods.
It's a silly little story, one that makes me smile the way college stories do. But I always think of it whenever I'm dealing with sardines.
Unfortunately, The "Settlement" Cook Book's version is less than stellar. You mash up sardines and hard-boiled eggs into a kind of paste, which you then spread on sandwiches. It's a perfectly serviceable meal, but it lacks flavor. Perhaps the eggs cut the fishy flavor of the sardines. Honestly, when I'm eating sardines, I want the full experience. You're wrinkling your nose, I know, but it's true. Go big or go home, they say, and it's the same with sardines.
Just ask Charysse and her grandmother. They'll tell you.
What about you? Do you have any weird food preferences? I'd love to chat...
Sardine Sandwiches
(adapted from The "Settlement" Cook Book)
1 4.25 oz can of sardines in oil
2 hard-boiled eggs, shelled
1-2 tsp lemon juice
salt and pepper to taste
3-4 tsp olive oil
Rinse the sardines with fresh water and drain. Pick out the spine and other prominent bones from the fish. With a fork or potato masher, mash together the sardines and eggs in a small bowl. Add the lemon juice and salt and pepper, then add just enough olive oil to bring the mixture together into a paste. Serve on toasted bread with fresh greens.
Monday, September 10, 2012
A tale of two peanut butters
This weekend the weather turned. It's been hot and muggy all week, the air dense with rain. And now the heat has burned off and it actually feels like fall. Supposedly it won't last, but after Saturday, we'll take it.
Even though summer is my favorite season, there are loads of things I like about fall. The crisp leaves, the way the air feels fresh and brisk, cooking with apples and pumpkins, going to harvest festivals. I love getting ready for school (which is probably why I became a teacher), picking out new notebooks and pens and binders. That back-to-school trip to Office Max or Staples, where the shelves are full of notebooks and the air is crisp with possibility...sigh.
I'm a huge nerd.
This year things are quite different for me as a teacher, since I'm working part-time as a humanities teacher at a Montessori school. As I mentioned earlier, there's a lot to get used to about this new set-up. Aside from a few bumps, it's been going smoothly, but I'm still trying to figure out the most important thing: lunch.
When do I eat it? Do I eat it in the classroom with the children? Do I wait until I go home? If I don't get out of the building until 12:30, and I don't get home until 1:15, will I be dying of hunger? What should I make? What's portable and easy to heat up when there's a line of children waiting to use the microwave?
As you can see, it's a topic fraught with anxiety.
At my previous school, teachers ate separately from students and had time to heat up their food and chat with each other. At this school, teachers eat in the classroom with their students and manage to down a few bites in between kids asking where the forks and knives are, if they can go outside and play because they finished their lunches in five minutes, etc. A very different experience. So far I've been sticking to salads, but I'm itching to try something new. Exotic sandwiches? Maybe soup?
Lo and behold, The "Settlement" Cook Book had just what I needed: a whole chapter on sandwiches for luncheon. You'd typically make these recipes for an afternoon picnic or an informal luncheon with your closest lady friends. I flipped through the chapter, looking for something that sounded promising. And then I found it: "Peanut paste for sandwiches."
The 1903 equivalent of peanut butter! A classic school lunch! Even the recipe was easy: after crushing half a cup of peanuts (with your modern food processor), you mix in a cup of boiling water, some cornstarch, and let the whole mixture thicken for 8 minutes, after which you season it with poultry spices. Aside from the poultry spices, it seemed pretty straightforward.
Little did I know. I'm not sure what kind of peanuts Mrs. Kander used when she wrote the recipe, but those crushed peanuts did not thicken into a paste until I'd added a tablespoon of cornstarch and boiled the heck out of it for half an hour. So by the time I sat down to lunch, my expectations weren't too high. I decided to compare the peanut paste with Jif Natural peanut butter from our pantry, rounding out the whole meal with some lingonberry jam (thank you, Ikea) and carrots. Like I said, a classic school lunch. With a twist.
And the twist is this: peanut paste tastes pretty much like you crushed up some peanuts and mixed them with water. It's less appetizing than whole shelled peanuts, and the poultry spices make it more savory than sweet. I found myself nibbling on my Jif peanut butter and jelly sandwich in between every bite of the peanut paste one. While this recipe isn't one of my major failures, it's a disappointment.
I'll stick with Jif.
Labels:
fall,
legumes,
lessons learned,
sandwiches,
school,
settlement cookbook
Thursday, August 30, 2012
To make ice cream
It's been a busy summer, one full of transitions: family milestones, a move ten minutes down the road, exotic travel, a new school. This week I've been focusing on that last one, a new school, as we get ready for classes to start next week. There's a new commute to learn, a new curriculum to design, new/old books to dig out of storage in the school's makeshift building. I'm excited, but as you well know, I also have a hard time dealing with transitions. Especially when these transitions come with challenges.
Luckily the big challenges seem to be reserved to the new home so far (like major water pipes bursting at 7 at night because the city of Providence is doing construction work on our street). Normally this would be a minor annoyance. But when the past three months have felt like one massive bundle of changes, it turns into a big frustration. Like, crying-worthy (don't worry, I didn't cry over the loss of water pressure....but I thought about it).
Even cooking, my old standby, has been hit with the new house challenge bug. A few days ago I decided to try out an ice cream maker given to us by Josh's grandmother. I'd recently gotten a copy of Jeni's Splendid Ice Creams at Home and was dying to try out at least half of the recipes straight away. What better time to try out the ice cream maker?
Hah. Well. A better time may have been once things settled down and I didn't feel like crying at the drop of a hat. As it turns out, ice cream making is a little trickier than the manual makes it sound.
First, some background: Jeni Britton Bauer founded Jeni's Splendid Ice Creams in Columbus, OH, after years of experimenting with homemade ice cream. Her business has grown to 9 shops in Ohio and 2 in Tennessee, and just last summer I discovered that one of those shops happened to be in my hometown. With flavors like Salty Caramel, Queen City Cayenne (spicy chocolate), and Lemon and Blueberries, it was like a revelation. I went basically every day I was home that summer.
And now there's a cookbook! I ambitiously decided to make her Sweet Corn and Black Raspberry ice cream instead of continuing to unpack in the new apartment (YOU tell me which one sounds like more fun). And I quickly discovered that when you haven't used an ice cream maker with a frozen canister before, that canister has to be frozen for a full 24 hours before you use it. Otherwise your beautiful, creamy mixture scented with corn will refuse to freeze. It will instead be slightly thicker than when you started, and you'll have to stick it in the back of the freezer to force it to harden, and it will turn icy after a few days.
Again, I thought about crying.
However, the ice cream was delicious. And this setback mostly made me want to try again (with a different flavor, of course). And because I'm me, it also sent me on a hunt to discover how the Victorians made ice cream.
No one is surprised by this turn of events.
According to The "Settlement" Cook Book, making ice cream was rather more of an endeavor in the days before freezers and electricity. While references to ice cream go back to the days of ancient China and Persia, it wasn't until the late19th century that regular Americans were introduced to ice cream sodas. Ice cream sodas and sundaes continued to be rare treats until refrigeration became much more common in the early 20th century. So while there's a whole chapter on ice cream and frozen desserts in The "Settlement" Cook Book, these recipes would probably be reserved for special occasions.
And with good reason. First you had to make your own freezing mixture (Kander recommends three parts ice to one part rock salt), then place a can with the cream mixture inside the bucket that held the freezing mixture (so the cold surrounded the ice cream). After adjusting the amount of ice (it's a very careful procedure), you turned the crank steadily, letting the mixture rest periodically, until it was frozen. After that you had to make a different freezing mixture (four parts ice to one part rock salt), replace the old with the new, and let the whole thing sit for a few hours until ready to serve. Oh, and the ice cream maker should be covered "with carpet or newspaper." (For insulation?)
The whole thing sounded even riper for disaster than my own electric maker. Imagine churning ice cream by hand for half an hour! And chipping ice to pack the ice cream in! And not having a freezer!
After I read that, I felt both better about my predicament (it's not so hard to make ice cream nowadays, I can always try again) and worse (it's not so hard to make ice cream nowadays, so why couldn't I do it?). But my cooking spirit remains indomitable. And I will conquer the ice cream maker before school starts.
Luckily the big challenges seem to be reserved to the new home so far (like major water pipes bursting at 7 at night because the city of Providence is doing construction work on our street). Normally this would be a minor annoyance. But when the past three months have felt like one massive bundle of changes, it turns into a big frustration. Like, crying-worthy (don't worry, I didn't cry over the loss of water pressure....but I thought about it).
Even cooking, my old standby, has been hit with the new house challenge bug. A few days ago I decided to try out an ice cream maker given to us by Josh's grandmother. I'd recently gotten a copy of Jeni's Splendid Ice Creams at Home and was dying to try out at least half of the recipes straight away. What better time to try out the ice cream maker?
| Jeni's t-shirt, Jeni's cookbook, Jeni's ice cream |
Hah. Well. A better time may have been once things settled down and I didn't feel like crying at the drop of a hat. As it turns out, ice cream making is a little trickier than the manual makes it sound.
First, some background: Jeni Britton Bauer founded Jeni's Splendid Ice Creams in Columbus, OH, after years of experimenting with homemade ice cream. Her business has grown to 9 shops in Ohio and 2 in Tennessee, and just last summer I discovered that one of those shops happened to be in my hometown. With flavors like Salty Caramel, Queen City Cayenne (spicy chocolate), and Lemon and Blueberries, it was like a revelation. I went basically every day I was home that summer.
And now there's a cookbook! I ambitiously decided to make her Sweet Corn and Black Raspberry ice cream instead of continuing to unpack in the new apartment (YOU tell me which one sounds like more fun). And I quickly discovered that when you haven't used an ice cream maker with a frozen canister before, that canister has to be frozen for a full 24 hours before you use it. Otherwise your beautiful, creamy mixture scented with corn will refuse to freeze. It will instead be slightly thicker than when you started, and you'll have to stick it in the back of the freezer to force it to harden, and it will turn icy after a few days.
Again, I thought about crying.
However, the ice cream was delicious. And this setback mostly made me want to try again (with a different flavor, of course). And because I'm me, it also sent me on a hunt to discover how the Victorians made ice cream.
No one is surprised by this turn of events.
According to The "Settlement" Cook Book, making ice cream was rather more of an endeavor in the days before freezers and electricity. While references to ice cream go back to the days of ancient China and Persia, it wasn't until the late19th century that regular Americans were introduced to ice cream sodas. Ice cream sodas and sundaes continued to be rare treats until refrigeration became much more common in the early 20th century. So while there's a whole chapter on ice cream and frozen desserts in The "Settlement" Cook Book, these recipes would probably be reserved for special occasions.
![]() |
| 1843 vintage |
The whole thing sounded even riper for disaster than my own electric maker. Imagine churning ice cream by hand for half an hour! And chipping ice to pack the ice cream in! And not having a freezer!
After I read that, I felt both better about my predicament (it's not so hard to make ice cream nowadays, I can always try again) and worse (it's not so hard to make ice cream nowadays, so why couldn't I do it?). But my cooking spirit remains indomitable. And I will conquer the ice cream maker before school starts.
Labels:
adventure,
books,
dessert,
disaster,
history lesson,
lessons learned,
settlement cookbook
Thursday, July 26, 2012
Lemonade
High summer in Rhode Island. The days are long and sticky and oppressive (but not as humid as Ohio, where summer can feel like you're swimming through tar). Although the mornings are cool and breezy, they burn off quickly once the blazing sun gets going. If you're out for a walk, you probably spend it hopping from one spot of shade to the next.
This kind of heat always makes me think of that Gershwin song from Porgy and Bess, "Summertime." You know the one: "Summertime, and the livin' is easy." My sister and I sang it a few times with our high school choir, and I remember our choir director telling us to slow it down, to saunter through the song. You can't rush a song like this. You have to imagine you're sitting on a porch in the twilight, shooting the breeze with a friend. Of course, try telling that to a bunch of high school girls who are always thinking of something more exciting than sitting on the porch in the summer.
Now I get it. I like the ease of having nothing in particular to do, of ambling through the day because there's no helping the heat. Every year around this time I get the urge to sing "Summertime" to my sister (we have a relationship full of musical clips and BBC quotations), just because it captures this season like nothing else. The words slip out slow like molasses, and your voice slides from one note to the next. It's the perfect song for summer.
And for refreshment?
Lemonade, only lemonade.
This is one of the simplest recipes I've ever made on this blog. You just need water, sugar, and a fresh lemon. It's a slow and easy recipe, like the Gershwin song. You can let the water and sugar take its time to dissolve, and squeeze in the lemon juice at the last moment. You can chill it overnight or just pour yourself a glass right there. It's a fairly sweet drink, so you might want to reduce the amount of sugar. It's up to you.
Of course, in my opinion there's only one right way to serve this lemonade. On the porch in the twilight, listening to Ella and Louis sing about summer.
Lemonade
(slightly adapted from The "Settlement" Cook Book)
1 lemon
3-4 tbsp sugar
2 cups water
Heat the water just until boiling, and pour over the sugar. (You may want to start with 3 tbsp and adjust to taste once you've added the lemon.) Stir to dissolve, and let sit until cool. Squeeze the juice of the lemon into the sugar water, and stir to combine. Add sugar to taste. Strain the liquid to remove any seeds or pulp. Chill overnight, or pour yourself a glass over ice.
Tuesday, July 24, 2012
Nutrition, 1903 style (II)
Yesterday I posted some of my fan-girl thoughts on Michael Pollan's In Defense of Food and presented a nutritional table from The "Settlement" Cook Book. Now I'd like to think about what this 1903 table has to do with our eating habits today.
The interesting thing about The "Settlement" Cook Book is that it's just the beginning of nutritionism, Pollan's term for focusing on the nutritional value of foods. It looks very similar to early nutritional science (developed by Justus von Liebig), which proposed that humans need only protein, fat, carbohydrates, and a few other minerals to thrive. Mrs. Kander has broken down these "macronutrients" into smaller categories, as well as identified the foods that will provide these essential nutrients.
In examining this table, you'll notice a few other interesting aspects:
So how does this translate into the rest of the cookbook?
What's striking to me about Kander's cookbook (and her informational tables) is that focus on nutritionism. By 1903, cooks were already thinking of food in terms of its nutritional value. This has to be connected to the number of recipes we see for animal products (full of protein) and starchy foods (like potatoes). And I guess it's also connected to the lack of recipes for leafy greens, which don't even make it onto the nutritional table in the first place.
It doesn't seem to promote a very healthy diet by our modern standards, that's for sure. On the contrary, the meals would look a lot like classic Midwestern food: meat and potatoes. My parents ate a lot of meat and potatoes growing up, as did a number of white, middle-class families in mid-20th century America. It makes me wonder if Kander's cookbook (and others like it) encouraged this trend in the early 20th century.
However, I hesitate to draw further conclusions about 1903 Wisconsin based on Kander's work. For one thing, it's only one cookbook (hardly representative of a nationwide trend). For another, we know she created her cookbook to train immigrants in American cooking, so there are a number of biases and assumptions about immigrants worked into the recipes. Finally, the content of the cookbook may be dictated largely by the crops grown in Wisconsin at the time, as well as the ethnic makeup of the area.
But it's a fascinating exercise in culinary history.
Of course, we haven't even touched the 9 chapters on desserts. Just a guess, but those probably couldn't be considered nutritional...
Works cited: Michael Pollan, In Defense of Food.
The interesting thing about The "Settlement" Cook Book is that it's just the beginning of nutritionism, Pollan's term for focusing on the nutritional value of foods. It looks very similar to early nutritional science (developed by Justus von Liebig), which proposed that humans need only protein, fat, carbohydrates, and a few other minerals to thrive. Mrs. Kander has broken down these "macronutrients" into smaller categories, as well as identified the foods that will provide these essential nutrients.
In examining this table, you'll notice a few other interesting aspects:
- She's not saying you should eat processed foods enhanced with these nutrients. There wasn't enough prestige attached to nutritional science yet, so there weren't very many processed foods on the market in 1903.
- There are very few vegetables on this table. Peas, beans, potatoes...apparently leafy greens were considered nutritionally useless!
- There's a lot of attention paid to meat, fish, eggs, bones, milk, and cheese.
| greens, you're useless to me. |
So how does this translate into the rest of the cookbook?
- Much of the "Vegetables" chapter is taken up by potato recipes.
- "Salads" often consist of lettuce with potatoes, meat, fish, nuts, or fruit.
- The chapters break down thusly:
- 4 chapters on meat, fish, or eggs
- 2 chapters on vegetables and salad
- 1 chapter on cereal
- 3 chapters on bread and fried cakes
- 9 chapters on desserts (!)
- a few chapters on sandwiches, beverages, and canning.
What's striking to me about Kander's cookbook (and her informational tables) is that focus on nutritionism. By 1903, cooks were already thinking of food in terms of its nutritional value. This has to be connected to the number of recipes we see for animal products (full of protein) and starchy foods (like potatoes). And I guess it's also connected to the lack of recipes for leafy greens, which don't even make it onto the nutritional table in the first place.
It doesn't seem to promote a very healthy diet by our modern standards, that's for sure. On the contrary, the meals would look a lot like classic Midwestern food: meat and potatoes. My parents ate a lot of meat and potatoes growing up, as did a number of white, middle-class families in mid-20th century America. It makes me wonder if Kander's cookbook (and others like it) encouraged this trend in the early 20th century.
However, I hesitate to draw further conclusions about 1903 Wisconsin based on Kander's work. For one thing, it's only one cookbook (hardly representative of a nationwide trend). For another, we know she created her cookbook to train immigrants in American cooking, so there are a number of biases and assumptions about immigrants worked into the recipes. Finally, the content of the cookbook may be dictated largely by the crops grown in Wisconsin at the time, as well as the ethnic makeup of the area.
But it's a fascinating exercise in culinary history.
Of course, we haven't even touched the 9 chapters on desserts. Just a guess, but those probably couldn't be considered nutritional...
Works cited: Michael Pollan, In Defense of Food.
Labels:
books,
health,
history lesson,
michael pollan,
settlement cookbook
Monday, July 23, 2012
Nutrition, 1903 style (I)
Now that we've gotten comfortable with the sorts of recipes available in The "Settlement" Cook Book, I'd like to take a look at the book's attitude towards food. Before this project (and before I did some serious thinking about food and health), I hadn't thought much about the different ways a person could view food. My mom has sometimes said that you can either live to eat, or eat to live (she's of the latter camp). So for a long time that was how I thought about food and eating (guess which camp I'm in). But Michael Pollan's In Defense of Food opened my eyes to the vastly different ways of considering food and eating, especially in this modern age of Nutrition Facts and Enriched Foods and Minerals With Fancy Long Words No One Can Pronounce.
One of the first arguments Pollan makes in his book is that in today's Western society, nutrients are considered more important than food. Scientists have reduced food down to its nutritional components, which allows big manufacturers to enrich their processed foods with the "good" nutrients, and tout their products as "healthy." So we're encouraged to eat a lot of processed foods that are Enriched and Full of Minerals And Vitamins, because these foods are "good for us." He calls this concept scientific reductionism.
Pollan's ultimate point is that it's far better to eat a limited quantity of whole foods (preferably vegetables) than to eat this host of nutritionally-enhanced products, because there are two major problem with scientific reductionism:
Pollan says all of this much more eloquently and convincingly than I ever could (and if it's not evident yet, GO READ THIS BOOK). But what matters is this: we've gone ahead and created a manufacturing empire based on science we don't fully understand.
So what does all of this have to do with The "Settlement" Cook Book?
Here is the very first page of the very first chapter of the cookbook:
There you have it. Back in 1903, Americans were already thinking of food in terms of nutrients.
Tomorrow we'll look at this fancy table in depth to see what it tells us about 1903.
Works cited: Michael Pollan, In Defense of Food.
One of the first arguments Pollan makes in his book is that in today's Western society, nutrients are considered more important than food. Scientists have reduced food down to its nutritional components, which allows big manufacturers to enrich their processed foods with the "good" nutrients, and tout their products as "healthy." So we're encouraged to eat a lot of processed foods that are Enriched and Full of Minerals And Vitamins, because these foods are "good for us." He calls this concept scientific reductionism.
Pollan's ultimate point is that it's far better to eat a limited quantity of whole foods (preferably vegetables) than to eat this host of nutritionally-enhanced products, because there are two major problem with scientific reductionism:
- We don't fully understand how the complex variety of nutrients within whole foods impacts the body. We can isolate each nutrient, but each nutrient can behave differently when consumed with the other nutrients available in, say, an apple.
- We don't fully understand how the order in which we eat foods, and how the combination of foods we eat at any one time, impacts our bodies.
Pollan says all of this much more eloquently and convincingly than I ever could (and if it's not evident yet, GO READ THIS BOOK). But what matters is this: we've gone ahead and created a manufacturing empire based on science we don't fully understand.
So what does all of this have to do with The "Settlement" Cook Book?
Here is the very first page of the very first chapter of the cookbook:
There you have it. Back in 1903, Americans were already thinking of food in terms of nutrients.
Tomorrow we'll look at this fancy table in depth to see what it tells us about 1903.
Works cited: Michael Pollan, In Defense of Food.
Labels:
books,
health,
history lesson,
michael pollan,
settlement cookbook
Monday, July 16, 2012
Berliner Pfann kuchen
We're fast-forwarding here (briefly) to the 1960s. After East Germany built the Berlin Wall in 1963, dividing Berlin into two parts, President John F. Kennedy paid a visit to West Berlin to demonstrate America's support for the divided country. During this visit, he gave a memorable speech in which he proclaimed,
But unfortunately (or fortunately for JFK), this is one of those history myths. As my friend Aaron explained, it's still linguistically correct for a person to say "ein Berliner" if they want to say they are a citizen of Berlin (especially if they're trying to be symbolic, rather than literal, as the president was). So JFK did indeed say that he was a Berliner, or a citizen of Berlin. He was not a jelly doughnut.
But this is!
Remember that versatile kuchen dough that can be used for so many different confections? I made another batch a few days ago and turned it into Berliner Pfann kuchen: jelly doughnuts. Then they took center stage at a doughnut party I held for some friends.
This is a beautiful treat. After making a regular kuchen dough and letting it rise, you roll it out and cut out circles with a biscuit cutter (same as before). This time, though, you place a dollop of jam in the middle of only half the circles and place a plain circle on top. Seal it up by pinching the sides and let rise until light. Then you fry them up in fat (I used Crisco) and roll in cinnamon sugar.
Sigh. Is there anything better than homemade doughnuts?
I think not.
Berliner Pfann kuchen
(adapted slightly from The "Settlement" Cook Book)
1 batch kuchen dough
1/3 cup your choice jam (I used homemade strawberry)
egg white (you can use the leftover from the kuchen dough)
vegetable oil or Crisco for frying
Once the kuchen dough has risen, punch it down and roll out on a floured board to about 1/2 inch thickness. Cut the dough into circles with a biscuit cutter. Make an indentation in half the circles and place a dollop of jam in the middle. Brush the edges of the dough with egg white and place a plain circle of dough on top, creating a sandwich. With your fingers, pinch the sides of the dough to seal it shut. Let rise until light, about twenty minutes.
Heat the vegetable oil over high heat. Once a deep fryer thermometer registers 350 F, use a slotted spoon to place the doughnuts in the fat, about 2-3 at a time. Watch them carefully, as they'll brown quickly. When they've browned on one side (about 2 minutes), turn them over and let them brown on the other side. Remove to a pan lined with paper towels. While the doughnuts are cooling, you can roll them in cinnamon sugar (cinnamon + sugar, your choice of ratios) if you'd like.
"Ich bin ein Berliner!"There's a rumor floating around that what Kennedy literally said was,
"I am a jelly doughnut."See, while Berliner can refer to a citizen of Berlin, it can also refer to a popular German confection, Berliner Pfannkuchen, which is often shortened to Berliner. This pastry is very like a jelly doughnut. By using the article "ein" before "Berliner," then, say the critics, JFK was calling himself a doughnut rather than a symbolic citizen of Berlin. It's a fun story that gains a lot of traction in high school classrooms. Indeed, I think I first heard this story in my own 11th-grade European history class.
But unfortunately (or fortunately for JFK), this is one of those history myths. As my friend Aaron explained, it's still linguistically correct for a person to say "ein Berliner" if they want to say they are a citizen of Berlin (especially if they're trying to be symbolic, rather than literal, as the president was). So JFK did indeed say that he was a Berliner, or a citizen of Berlin. He was not a jelly doughnut.
But this is!
Remember that versatile kuchen dough that can be used for so many different confections? I made another batch a few days ago and turned it into Berliner Pfann kuchen: jelly doughnuts. Then they took center stage at a doughnut party I held for some friends.
This is a beautiful treat. After making a regular kuchen dough and letting it rise, you roll it out and cut out circles with a biscuit cutter (same as before). This time, though, you place a dollop of jam in the middle of only half the circles and place a plain circle on top. Seal it up by pinching the sides and let rise until light. Then you fry them up in fat (I used Crisco) and roll in cinnamon sugar.
Sigh. Is there anything better than homemade doughnuts?
I think not.
Berliner Pfann kuchen
(adapted slightly from The "Settlement" Cook Book)
1 batch kuchen dough
1/3 cup your choice jam (I used homemade strawberry)
egg white (you can use the leftover from the kuchen dough)
vegetable oil or Crisco for frying
Once the kuchen dough has risen, punch it down and roll out on a floured board to about 1/2 inch thickness. Cut the dough into circles with a biscuit cutter. Make an indentation in half the circles and place a dollop of jam in the middle. Brush the edges of the dough with egg white and place a plain circle of dough on top, creating a sandwich. With your fingers, pinch the sides of the dough to seal it shut. Let rise until light, about twenty minutes.
Heat the vegetable oil over high heat. Once a deep fryer thermometer registers 350 F, use a slotted spoon to place the doughnuts in the fat, about 2-3 at a time. Watch them carefully, as they'll brown quickly. When they've browned on one side (about 2 minutes), turn them over and let them brown on the other side. Remove to a pan lined with paper towels. While the doughnuts are cooling, you can roll them in cinnamon sugar (cinnamon + sugar, your choice of ratios) if you'd like.
Thursday, July 12, 2012
Flaxseed tea
There can be hidden gems in old cookbooks. Like last week's kuchen tarts, or the Little House apple turnovers, or the Old Virginia pancakes. Come to think of it, those hidden gems all have to do with baking or flour-based deliciousness.
Anyway. Sometimes there are successes. And sometimes there are failures. And sometimes there are just plain weird recipes.
Flaxseed tea is just such a recipe. It sounds promising, like the kind of tea brewed from garden leftovers that Marilla might have served to Anne out at Green Gables. Unfortunately, the properties of the flax seed make it into an entirely different beverage than you'd expect.
Here are the basics:
This so-called "tea" thus becomes a thick, jelly-like substance. Once mixed with lemon juice, it tastes and feels like...well...lemon-flavored egg whites.
While I appreciated the nutritious aspects of the flax seed, I couldn't really get over the texture. This isn't one to try at home, folks. (Your home, really, since my home has been serving as a test kitchen for the bizarre for over a year.) I wish that I always had an open mind when it comes to unusual recipes, flavors, and textures, but alas: mucilage is one thing I don't want to learn to like.
Anyway. Sometimes there are successes. And sometimes there are failures. And sometimes there are just plain weird recipes.
Flaxseed tea is just such a recipe. It sounds promising, like the kind of tea brewed from garden leftovers that Marilla might have served to Anne out at Green Gables. Unfortunately, the properties of the flax seed make it into an entirely different beverage than you'd expect.
Here are the basics:
- After washing 1 tbsp of flax seed (I just so happened to have some lying around...that's how I know I'm turning into a health-conscious cook), mix it with 1 cup cold water.
- Simmer the mixture on low heat for an hour.
- Stir in the juice of 1 lemon and sugar to taste (Mrs. Kander recommends 1 tbsp, but that's a lot. I didn't add any).
This so-called "tea" thus becomes a thick, jelly-like substance. Once mixed with lemon juice, it tastes and feels like...well...lemon-flavored egg whites.
While I appreciated the nutritious aspects of the flax seed, I couldn't really get over the texture. This isn't one to try at home, folks. (Your home, really, since my home has been serving as a test kitchen for the bizarre for over a year.) I wish that I always had an open mind when it comes to unusual recipes, flavors, and textures, but alas: mucilage is one thing I don't want to learn to like.
Monday, July 9, 2012
Mint julep
Now that summer (with all its heat and humidity) is in full swing, my sister Lissa has been contemplating what would make the weather more bearable. There's swimming, long afternoons in Starbucks, evenings at the air-conditioned movie theater.* There's also the tried-and-true tradition of iced mixed drinks. Every few days, she sighs wistfully, "Wouldn't it be nice to be sipping a mint julep on a Southern porch?"
Oh, it's all fine and dandy until you get to the "glass" of whiskey or brandy. How big is a "glass"?
So I turned to my trusty Joy of Cooking for advice. But the mystery only deepened, for Joy instructed:
"Jigger"?
"Pony"?
For the first time I began to regret that I don't drink cocktails. If I did, perhaps I'd know the lingo. Apparently you don't have to go back in time to find hard-to-decipher recipes.
Finally, after much searching, I discovered a handy table in Joy that explained that 1 "jigger" equals 1 1/2 oz, not to be confused with the "large jigger" (2 oz), while a "pony" equals 1 oz. So after cross-referencing the modern recipe with the 1903 recipe, and discovering that our liquor cabinet had only brandy, and converting the weird bar slang to actual measurements, and failing to crush ice from our freezer, I managed to make two mint juleps, one for me and one for my dad. Lissa supervised the proceedings, though she did not taste the results. And indeed, the drink was refreshing, cool and minty.
Lest my sister ever complain that I'm not nice enough to her, let this be a testament to my devotion: I'm willing to battle multiple recipes and cabinet shortages to make her a cocktail she won't even drink.
But that doesn't mean it wasn't fun.
Mint Julep (1903 Version)
(adapted from The "Settlement" Cook Book and Joy of Cooking)
two servings
for the sugar syrup:
2 tsp sugar
1 tsp hot water
for the drinks:
6 oz brandy or whiskey, divided
9-10 sprigs mint, plus more to garnish
ice to fill (it's supposed to be crushed, but I liked it with regular ice)
Make the syrup: mix the sugar and water together in a small bowl until dissolved.
Make the drinks: divide the syrup equally into two tall glasses (if you don't have julep cups, you can use tall bar glasses). Squeeze the mint in your hand to release some of the oil (a nice compromise between bruising and not), and place 4-5 sprigs, leaves up, in each glass. Pour 1 1/2 oz brandy or whiskey into each glass. Fill each glass with ice until 3/4 full. Pour another 1 oz brandy or whiskey into each glass, and stir to combine. Garnish with extra mint leaves.
Serve on a porch in the twilight.
| she's up to something |
Yes, it would be nice. In fact, we can sip mint juleps right here on our Ohio porch. Except for the fact that Lissa doesn't drink alcohol.
Despite this drawback, I decided to make mint juleps anyway. Lissa could imbibe in spirit (hah), while my dad and I enjoyed a refreshing cocktail. So I flipped open the "Settlement" book to its recipe for "Mint Julep."
Then the trouble began.
You know how I've occasionally had to do complicated mathematics to figure out measurements? And how I rejoiced that this "modern" cookbook gave you all of the measurements so you didn't have to work too hard? Not so for mint juleps. Here is the recipe in full:
Large Thin Julep Glass--Dissolve one teaspoon fine sugar in water, one dash Maraschino, one glass whiskey or brandy as preferred, four or five sprigs mint held to side of glass, leaves up. Fill up with fine ice and do not bruise the mint. Trim with fruits. If preferred mint can be bruised, but above is the regular Southern julep.
Oh, it's all fine and dandy until you get to the "glass" of whiskey or brandy. How big is a "glass"?
So I turned to my trusty Joy of Cooking for advice. But the mystery only deepened, for Joy instructed:
Pour into bar glass: 1 large jigger bourbon whisky
"Jigger"?
Add more ice to within 3/4 inch of top of glass. Add: 1 pony whisky
"Pony"?
For the first time I began to regret that I don't drink cocktails. If I did, perhaps I'd know the lingo. Apparently you don't have to go back in time to find hard-to-decipher recipes.
Finally, after much searching, I discovered a handy table in Joy that explained that 1 "jigger" equals 1 1/2 oz, not to be confused with the "large jigger" (2 oz), while a "pony" equals 1 oz. So after cross-referencing the modern recipe with the 1903 recipe, and discovering that our liquor cabinet had only brandy, and converting the weird bar slang to actual measurements, and failing to crush ice from our freezer, I managed to make two mint juleps, one for me and one for my dad. Lissa supervised the proceedings, though she did not taste the results. And indeed, the drink was refreshing, cool and minty.
Lest my sister ever complain that I'm not nice enough to her, let this be a testament to my devotion: I'm willing to battle multiple recipes and cabinet shortages to make her a cocktail she won't even drink.
But that doesn't mean it wasn't fun.
Mint Julep (1903 Version)
(adapted from The "Settlement" Cook Book and Joy of Cooking)
two servings
for the sugar syrup:
2 tsp sugar
1 tsp hot water
for the drinks:
6 oz brandy or whiskey, divided
9-10 sprigs mint, plus more to garnish
ice to fill (it's supposed to be crushed, but I liked it with regular ice)
Make the syrup: mix the sugar and water together in a small bowl until dissolved.
Make the drinks: divide the syrup equally into two tall glasses (if you don't have julep cups, you can use tall bar glasses). Squeeze the mint in your hand to release some of the oil (a nice compromise between bruising and not), and place 4-5 sprigs, leaves up, in each glass. Pour 1 1/2 oz brandy or whiskey into each glass. Fill each glass with ice until 3/4 full. Pour another 1 oz brandy or whiskey into each glass, and stir to combine. Garnish with extra mint leaves.
Serve on a porch in the twilight.
* Except when the entire movie theater loses power. Like it did last week when we were one hour into Spiderman.
Labels:
adventure,
beverages,
family,
settlement cookbook,
summer
Thursday, July 5, 2012
Fourth of July Kuchen tarts
Right now I'm in Cleveland, enjoying a week with family and quiet mornings of blazing heat. While I love Providence, it's wonderful to escape from a city (even a small one) for a time. I get to remember what it's like to walk down the street hearing only the cooing of birds and the rustle of wind through the trees.
Plus, there's nothing like spending holidays with family, the Fourth of July included. We spent yesterday morning with my aunt and uncle and cousins, enjoying the local parade (and trying to stay cool).
Then we escaped back to the dark, cool house and set to the important work of preparing the evening barbecue. And because I can never ignore an excuse to bake, I made kuchen tarts.
My sister Lissa just finished her first year of a master's program in art history, and she spent her June taking German to pass her language qualifications. She is now the German expert of the family, and she tells me that kuchen (pronounced KU-khuhn, not KU-ken) means "cake" in German.
I made cake tarts!
There is absolutely nothing wrong or indulgent about that sentence.
(Lissa also speaks to me regularly in German. This is frustrating for two reasons: 1. I don't speak German, aside from the random phrases I've picked up from war movies. And 2. We used to speak to each other in Franglais, a broken form of French + English. She has left our Franglais behind for more exotic languages.)
Linguistic regrets aside, these tarts are amazing, as one might expect from something called "cake tarts."
They're made from a basic coffeecake-type dough, yeasty and sugary with a hint of nutmeg. Once you've let the dough rise, you can make all sorts of magical kuchen, from cakes filled with cinnamon and sugar to those filled with crushed poppy seeds and fried to perfection. Lissa tells me that modern kuchen aren't very much like those described in The "Settlement" Cook Book, but hey, it was 1903. We're using recipes that came over from Germany back in the 1840s and 1850s.
The kuchen tarts I chose feature a dollop of jam in the middle, perfect for Fourth of July color-coordination. I alternated between strawberry and blueberry jam to make a red and blue theme. Sadly, some of the jam melted off the tarts in the oven.
Later I discovered that you're probably supposed to put the biscuits in a cake pan so they sort of meld together like pull-apart coffeecake. But those are the mistakes you make when you're working from old-fashioned, unclear recipes that say only "place close together in a buttered pan."
But despite these drawbacks, the tarts were still delicious.
And my family only made a few jokes about the pronunciation of "kuchen."
Almost Kuchen Tarts
(adapted from The "Settlement" Cook Book)
For the dough:
1 cup milk
1/4 cup unsalted butter
1/4 cup sugar
1/2 tsp salt
pinch of nutmeg
1 beaten egg yolk (save the white for another purpose)
2 1/4 tsp active dry yeast (or 1 package active dry yeast)
3 1/2 - 4 cups flour
For the filling:
1/2 cup your choice of jam (I used 1/4 cup blueberry and 1/4 cup strawberry)
Scald the milk over medium heat (this means to heat it until small bubbles form around the edge, then remove from heat). Let cool to lukewarm. In a small bowl, mix the yeast and 1/2 tsp of the sugar, plus 1/4 cup of the lukewarm milk. Set in a warm place to proof. (You'll know it's working when the mixture puffs up like a sponge.)
Meanwhile, add the butter, the rest of the sugar, the salt, and nutmeg to the rest of the milk in the pan. Stir in the beaten egg yolk. Add the proofed yeast mixture and combine thoroughly. Add the flour one cup at a time. You may only need 3 1/2 cups, but add as much flour as you need to make a smooth, elastic dough. Transfer the dough to a large bowl, cover, and let rise until doubled in bulk. (This usually takes about an hour, but if it's as hot as it was yesterday, it may only take twenty minutes.)
When the dough is ready, punch down and transfer to a floured board. Roll out the dough to about one inch thickness, and cut with a biscuit cutter. Place the biscuits on a buttered cookie sheet and let rise until light, about twenty minutes.
Meanwhile, preheat the oven to 425 F and set out the jam filling. When the biscuits have risen, poke a hole in the center of each biscuit and drop in a spoonful of jam. Once you've filled all the biscuits, bake at 425 F for 10 minutes. Reduce the heat to 350 F and bake for another 5-10 minutes, until browned.
Plus, there's nothing like spending holidays with family, the Fourth of July included. We spent yesterday morning with my aunt and uncle and cousins, enjoying the local parade (and trying to stay cool).
Then we escaped back to the dark, cool house and set to the important work of preparing the evening barbecue. And because I can never ignore an excuse to bake, I made kuchen tarts.
My sister Lissa just finished her first year of a master's program in art history, and she spent her June taking German to pass her language qualifications. She is now the German expert of the family, and she tells me that kuchen (pronounced KU-khuhn, not KU-ken) means "cake" in German.
I made cake tarts!
There is absolutely nothing wrong or indulgent about that sentence.
(Lissa also speaks to me regularly in German. This is frustrating for two reasons: 1. I don't speak German, aside from the random phrases I've picked up from war movies. And 2. We used to speak to each other in Franglais, a broken form of French + English. She has left our Franglais behind for more exotic languages.)
Linguistic regrets aside, these tarts are amazing, as one might expect from something called "cake tarts."
They're made from a basic coffeecake-type dough, yeasty and sugary with a hint of nutmeg. Once you've let the dough rise, you can make all sorts of magical kuchen, from cakes filled with cinnamon and sugar to those filled with crushed poppy seeds and fried to perfection. Lissa tells me that modern kuchen aren't very much like those described in The "Settlement" Cook Book, but hey, it was 1903. We're using recipes that came over from Germany back in the 1840s and 1850s.
The kuchen tarts I chose feature a dollop of jam in the middle, perfect for Fourth of July color-coordination. I alternated between strawberry and blueberry jam to make a red and blue theme. Sadly, some of the jam melted off the tarts in the oven.
Later I discovered that you're probably supposed to put the biscuits in a cake pan so they sort of meld together like pull-apart coffeecake. But those are the mistakes you make when you're working from old-fashioned, unclear recipes that say only "place close together in a buttered pan."
But despite these drawbacks, the tarts were still delicious.
And my family only made a few jokes about the pronunciation of "kuchen."
Almost Kuchen Tarts
(adapted from The "Settlement" Cook Book)
For the dough:
1 cup milk
1/4 cup unsalted butter
1/4 cup sugar
1/2 tsp salt
pinch of nutmeg
1 beaten egg yolk (save the white for another purpose)
2 1/4 tsp active dry yeast (or 1 package active dry yeast)
3 1/2 - 4 cups flour
For the filling:
1/2 cup your choice of jam (I used 1/4 cup blueberry and 1/4 cup strawberry)
Scald the milk over medium heat (this means to heat it until small bubbles form around the edge, then remove from heat). Let cool to lukewarm. In a small bowl, mix the yeast and 1/2 tsp of the sugar, plus 1/4 cup of the lukewarm milk. Set in a warm place to proof. (You'll know it's working when the mixture puffs up like a sponge.)
Meanwhile, add the butter, the rest of the sugar, the salt, and nutmeg to the rest of the milk in the pan. Stir in the beaten egg yolk. Add the proofed yeast mixture and combine thoroughly. Add the flour one cup at a time. You may only need 3 1/2 cups, but add as much flour as you need to make a smooth, elastic dough. Transfer the dough to a large bowl, cover, and let rise until doubled in bulk. (This usually takes about an hour, but if it's as hot as it was yesterday, it may only take twenty minutes.)
When the dough is ready, punch down and transfer to a floured board. Roll out the dough to about one inch thickness, and cut with a biscuit cutter. Place the biscuits on a buttered cookie sheet and let rise until light, about twenty minutes.
Meanwhile, preheat the oven to 425 F and set out the jam filling. When the biscuits have risen, poke a hole in the center of each biscuit and drop in a spoonful of jam. Once you've filled all the biscuits, bake at 425 F for 10 minutes. Reduce the heat to 350 F and bake for another 5-10 minutes, until browned.
Subscribe to:
Posts (Atom)