Showing posts with label summer. Show all posts

Monday, September 2, 2013

Shortbread fans (and a bit about ovens)


It's the last gasp of summer, friends. The air is getting cool at night (sometimes). Stores offer apple cider in big displays. And this week I go back to school.

To mark the occasion, let's look at one more recipe from this summer's Canadian vacation. It's a pretty basic shortbread recipe, one that calls for three ingredients and a modicum of decoration. But things get interesting with the instructions.

First, the original recipe calls for "washed butter." Why would you need to give your butter a bath? According to the many homesteading blogs that encourage you to make your own butter, you have to wash fresh butter well in order to drain away all traces of milk. Otherwise it goes rancid. The only other reason I can think of for using "washed butter" here is to make sure your butter is, well, buttery. Shortbread depends on a specific blend of butter, flour, and sugar, and there's no room for anything else.


Once you've mixed all the ingredients and prepared the cookies, you're instructed to "bake in a slow oven (325 F)." What?

cooking range, c. 1910
The phrase "slow oven" comes from a time before ovens had regulated temperatures. You'll find it in early American cookbooks when food was baked in Dutch ovens and in later ones when women used monstrous ranges, the predecessor to today's stove-oven combination. Until the 1920s, when most families had made the transition to gas ovens, women had to rely on their understanding of heat to put on enough wood or coals to bake bread, or to let the coals burn out to bake something more delicate, like cookies. Even into the 1920s and 1930s, some families didn't have "heat regulators," as the editors of The Boston Cooking-School Cook Book called them. And if that was the case, "judgment and experience must be the guides."

The Boston Cooking-School Cook Book, from where this recipe originates, used both points of reference ("slow oven" and a specific temperature) because many Americans were in the middle of switching over when it was published in 1930. Some readers had heat regulators, while others didn't. It's fascinating to see how the smallest details can illuminate a turning point in American domestic history.

I am hopelessly reliant on temperatures, just as I am pretty dependent on recipes. But I was pleased to see that when reading colonial recipes, my interpretation of "slow oven" as 300 to 325 F was right on the mark.


Shortbread Fans
(slightly adapted from The Boston Cooking-School Cook Book)

2 cups all-purpose flour
1/2 cup brown sugar
3/4 cup butter, softened

Preheat the oven to 325 F (yes, we use temperatures around these parts). In a medium bowl, whisk flour and sugar together. Work in butter with your fingertips until well blended.

Roll out the dough on a floured surface to about 1/4-inch thickness and cut out rounds with a measuring cup. Slice each round in half and press each half-moon four times with the tip of a knife, creating a fan-like decoration. Bake for 10 minutes at 325 F, or until browned on the bottom.


Works cited: Cooking range photo from Family Lineages and History.

Monday, August 12, 2013

Blueberry picking (and muffins)


It's been two weeks since we returned from vacation in Canada, and I can't stop thinking about it. Even though I've since joined my parents for a weekend in upstate New York. Even though Josh and I have entertained and seen friends and gotten thoroughly back into the Providence swing of things. Even though school starts soon (gah!). There's just something about vacation that grabs you tight and doesn't let go.

This year's visit, more than anything, was defined by blueberries. Blueberry bushes run wild over the island, bordering paths and leading into the woods. If we're making pancakes for breakfast, my mom will often step outside to pick a handful of berries from the bushes behind the cabin. We usually go blueberry picking at least once on vacation, hoping to put the produce towards a fresh pie. If we're lucky, we'll pick enough so we don't have to supplement with "store-bought," a phrase that gives my grandfather heart palpitations when we're up at the island.


No such worries this year. My sister, Josh and I picked enough for a pie just from the bushes outside the cabin. Venturing farther afield, the whole family picked enough for a double portion of blueberry cobbler. Then we had berry muffins. Then we picked enough for another pie. We ate blueberry pancakes three times during our two-week visit. And we certainly left enough for the next visitors.

Needless to say, we had a bumper crop.


There's something so peaceful and zen-like about picking blueberries. Cup or pail in hand, you can hike as little or as far as you want until you find a good patch. The best berries are fat and round, like little blue stars, and if you brush them with your fingers they fall right into your hand (or onto the ground, as so often happens). It's easy to work longer than you're expecting; each time you pause or talk about heading back, you'll spy the perfect bush a few feet to the right. "Just one more," you'll think, reaching for the fruit. Sometimes you might mistake a dark huckleberry for a blue, but that doesn't matter, since they're both edible, and you're on vacation, and who's really counting?

blueberries (L) and huckleberries (R)


These muffins are one of the better ways to consume a cupful of fresh blueberries, should you find your lucky self in possession of some. Light and barely sweet, tasting of milk and butter, muffins are a great vehicle for fresh fruit. Especially when you've tried out all the other ways to eat blueberries.


Blueberry Muffins
(adapted from The Boston Cooking-School Cook Book by Fannie Merritt Farmer, 1930)

2 cups all-purpose flour
4 tsp baking powder
1/2 tsp salt
2 tbsp sugar
1 cup milk
2 tbsp melted butter
1 egg
1 cup blueberries, picked over and rinsed

Preheat the oven to 400 F. Line a muffin tin with liners, or brush with oil or butter. In a large bowl, combine the flour, baking powder, salt, and sugar, and whisk to mix. In a separate, medium bowl, combine the milk, butter, and egg. Don't worry if the butter clumps when you add it.

Quickly add the wet ingredients to the dry and stir a few times. Before it's fully incorporated, fold in the berries. Stir a few more times until just combined. Drop the batter into the prepared tins and bake at 400 F for 25 minutes, or until golden brown.

Monday, July 15, 2013

Away


For the next few weeks I'll be away on vacation with my family. Swimming, canoeing, reading, and cooler weather (fingers crossed) await! I'll be back at the beginning of August. In the meantime, you can read posts from last year's vacation here and here. Hope you're all enjoying summer!

Tuesday, July 2, 2013

Line-drying laundry


For a few weeks the dryer in our apartment building has been broken. Problem? Easily solved. After putting in a call to the landlord, we hung our clothes fresh from the washing machine out to dry on the balcony.

It's easy to string a line of twine from the hooks already hanging from the balcony ceiling. Yes, they're more for hanging plants. But they do the job just as well.


I piled clothespins in a basket and, working quickly, clipped shirts and PJ's to the line. Because the balcony faces the street, I decided to dry delicates inside on a wooden clothes rack stolen from my parents' house.

We line-dry clothes every summer when we're on vacation, but I always forget how stiff and wrinkly clothes get on the line. And when the weather's humid, the clothes stay damp for much longer than you'd expect. Nevertheless, once they're actually dry, they have this fresh-laundry smell that you just don't get from a hot dryer. And this handy old-fashioned method saves a ton of energy.

Have you ever line-dried clothes? What do you do to get the wrinkles out? And do you stick with it even through the winter months?

Thursday, June 27, 2013

Devil's cake no. 1


Yesterday I celebrated my birthday! I turned 27, just a few weeks after this blog turned 2. In between melting in the 90-degree heat and dashing through torrential rainstorms (yes, it was an eventful day, weather-wise), I enjoyed a pastry from my favorite bakery, assembled a Settlement birthday cake, and tried out a new restaurant with Josh. I can now say definitively that lots of food-related activities make for one delicious birthday.

Now, let's get serious about this birthday cake. My father loves buying cake. And I mean, he loves it. He buys decorated cakes (vanilla or yellow, with buttercream frosting) from Giant Eagle for every occasion he can think of: birthdays, Mother's Day, the Fourth of July...you name it, he celebrates it. Once my dad even bought a cake to celebrate my birthday when I wasn't even going to be home on the occasion. You get the picture: my family can be depended upon to have a bit of store-bought cake hanging out in the freezer at any given time.

However, I haven't enjoyed Giant Eagle cake since middle school. I'm not sure why, but for some reason the frosting and consistency of the cake just doesn't do it for me. I've tried a few different solutions, like cherry pie (to which my dad cried, "but it's not a real birthday without cake!"), and a marble cake in the hopes that chocolate would be tastier (our dog pulled it off the counter and ate it). Somewhere down the line I gave up and decided that making my own cake would be the easiest solution. But I haven't found the perfect recipe yet.


This year, I tried a recipe from The "Settlement" Cook Book, partly to kill two birds with one baking pan. It wasn't a total success; devil's food cake from 1903 is decidedly less chocolatey than our modern-day palates would like, and the method of making the frosting felt very old-fashioned. But it's still tasty, and a perfectly fine way to celebrate another birthday.


Devil's Cake No. 1
(from The "Settlement" Cook Book)

for the cake:
2 oz unsweetened chocolate
3 tbsp water
1 1/4 cups sugar
1/2 cup butter
1 cup buttermilk
1 tsp baking soda
1 egg yolk (reserve the white for the frosting)
2 cups flour

for the frosting:
1 cup sugar
1/3 cup water
2 oz unsweetened chocolate
1 egg white, beaten
1/8 tsp cream of tartar
1 tsp vanilla

To make the cake:
Preheat the oven to 350 F. Grease two 8-inch round pans and set aside.

In a small pan over low heat, melt the chocolate, water, and sugar together, stirring until dissolved. Add the butter and stir until blended. Remove from heat and let cool.

In a separate, large bowl, combine the buttermilk, baking soda, and egg yolk, beating well to blend. Add the cooled chocolate and beat well. In a few strokes, add the flour until just combined. Pour the mixture into the prepared pans and bake at 350 F for 30 minutes, or until a toothpick inserted into the center of the cake comes out clean.

To make the frosting:
Heat the water in a small pan over medium heat until just boiling, then add the sugar and stir. Once the sugar is completely dissolved, heat the mixture slowly without stirring to the boiling point. Let syrup cook until it forms a thread when drizzled from a spoon, about 20 minutes. Remove from heat and stir in the chocolate until well-blended.

When the syrup is ready, quickly add the cream of tartar to the egg white and beat to combine with a fork or whisk. Add the egg mixture to the chocolate syrup and beat well. Add vanilla and beat again. Let the mixture cool, placing in the fridge if necessary.

When ready to frost, stir the frosting once more. Turn one cake out onto a plate and frost evenly, then place the other cake on top. Spread remaining frosting with a knife or spoon.

Tuesday, June 18, 2013

The best-laid plans of gardeners

It's been some time since we've visited the container garden. Let's take a stroll, shall we?

Here's the basic layout: broad beans (the happy tall stalks in the corner); sugar snap peas climbing those bamboo trellises; one strawberry plant; onions flanking tomatoes and peppers; garlic and carrot shoots; lettuce; hyssop; an attempt at a Three Sisters planting (corn, green beans, and pumpkin); and rhubarb, generously given by my friend Gaia. There's lavender and lobelia, too, to pretty up the backyard.

A bit different from my original plans, right? While some of the seeds I started came up vigorous and healthy, some of the others grew anemic and spindly. And after I hardened them off and planted them in containers, we endured epic torrential rains. First in the spring, then just a few weeks ago. Day after day of rain, rain, endless rain, can do a number on your tender plants. And downpours from southern tropical storms can tear the leaves of your rhubarb plant to shreds.


Yes, shreds.


We've also discovered that our squirrels are vicious, vicious creatures. Since we moved in last summer, we didn't have a chance to find this out during the regular growing season. But oh, are we learning. They shimmy up drainpipes, they cling to our second-floor window screens, and they nibble at my almost-ripe strawberries to show who's really in charge. (Hint: it's not me.)


Nevertheless, we persevere. Next week I'll give you a glimpse of the "squirrel vault" Josh and I built to keep out those dastardly rodents. After the torrential rains, I replaced some of my drowned seedlings with more vigorous starts from the farmers' market and the store, and they're happily taking root. And while it's momentarily disappointing to see plants brought low by weather or critters, I'm excited to see what this adjusted garden will produce over the summer. (I'm also accepting any and all advice for dealing with squirrels, which are quickly becoming my fiercest enemies.)

Thursday, September 13, 2012

Kitchen garden (V)


It's been a while since the last update from the garden. Unfortunately, in between moving and travel, the poor tomatoes and peas had a rough transition. Those big green tomatoes I planned on harvesting? The squirrels at my new place have a fondness for them. While I waited for each tomato to ripen, the squirrels got impatient and helped themselves.

(The worst part was how the squirrels would carefully remove each tomato from the vine, take a big bite, and then leave the now-rotting tomato on the balcony to taunt me. Now I know why my dad has a book called Outwitting Squirrels.)

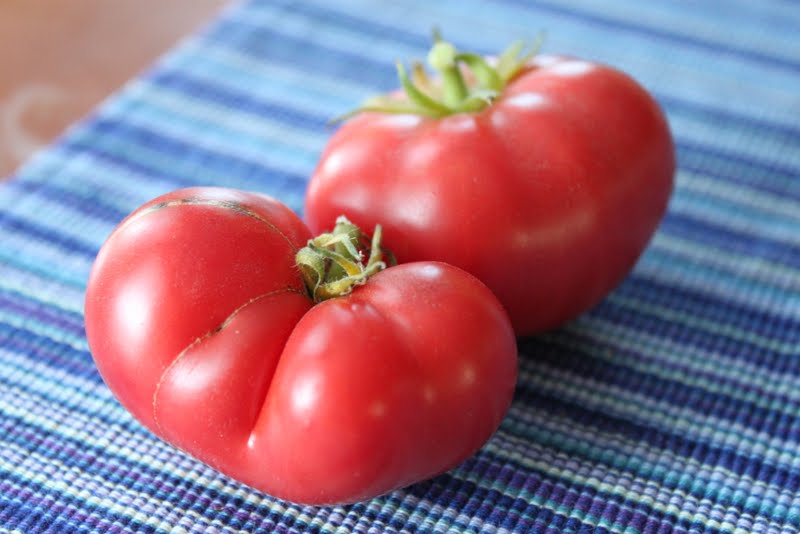
But somehow I managed to salvage two tomatoes, which now sit on the kitchen table waiting to be enjoyed. They're small and misshapen, not the giant fruits I'd hoped for. But they're red and they smell fresh and ripe...so I'll take them.


Tuesday, September 4, 2012

Canning fruit (II)

Yesterday I recounted how my friend Nina and I decided to can 40 lbs of tomatoes. When I left off, we had just realized how much time (and patience) this project required.


Nevertheless, we persevered. Once the crushed tomatoes had boiled, we started ladling them into our sterilized Mason jars (prepped with lemon juice to prevent evil bacteria from forming. Botulism is no joke).


Then came the fun part: lowering the filled jars back into the boiling water of the canning pot. This is what seals the jars and prevents more bacteria from forming.


After that, we let them all boil for 40 minutes while we maybe talked to them a little bit. Because they looked so cozy sitting together, and it can't hurt to encourage them.


However, by the time the sauce was ready, we had been at this canning project for 5 hours and I had plans for dinner. So courageous Nina finished the project on her own, documenting the final stages for posterity. We haven't counted the jars yet...but suffice it to say, we'll be eating a lot of tomatoes this winter.

photo by Nina
And the funniest thing about this whole project is that it didn't make us run screaming from the prospect of more canning. No, in the quiet moments while we waited for the sauce to boil, we flipped through Canning for a New Generation and made plans for fall and winter projects. Pear and ginger preserves, anyone? Spiced cranberries? We've already got our holiday presents taken care of!

This adventure reminded me why canning is so special.

  • First, you get to preserve the tastiest fruits and veggies from your garden (or your farmer's garden), to enjoy long into the winter.

  • Second, it brings people together. My friend Emily first taught me how to can, before I'd started this blogging project and dedicated myself to testing out homesteading methods. We made a batch of strawberry jam, and by the end of the afternoon I was a goner. It seems to be one of those skills that people pass on to one another, through afternoons in the kitchen or community classes. It helps bring people together.

  • Third, even if you can by yourself, you can give your gorgeous Mason jars as gifts (see holiday plans above).

  • Fourth (you knew this was coming), it's one of the most practical ways of carrying on historical cooking methods.

Intrigued? Want to try it yourself? Emily's written an excellent guide to canning your own jam, and I suggest you check it out if you've never canned before and want to try it.

Monday, September 3, 2012

Canning fruit (I)


Last Sunday, over dinner at our local Ethiopian restaurant, my friend Nina said, "When can we can?" And thus began a rather silly and ultimately fruitful (heh) endeavor of canning 40 lbs of tomatoes. And making lots of canning jokes. ("Yes, we can" is Nina's favorite.)

Canning is a fascinating process. Before refrigeration, it was one of the best ways for home cooks to preserve the bounty of their gardens long into the winter. Now that we can easily freeze leftover fruits and veggies, canning has become more of a fun way to preserve food than a necessity. Plus, along the way it's acquired an exotic sort of aura. Not everyone knows how to can, and the uninitiated tend to see it as a complicated art that requires years of practice. The funny thing is that it's pretty easy. It just takes time, patience, and a strict adherence to directions. Sort of like ice cream.

Here are the basics:

  • You prepare your fruit for canning (and yes, tomatoes are a fruit). You can do this however you wish; we used a few recipes from Liana Krissoff's excellent Canning for a New Generation.

  • Meanwhile, you should heat up a large pot for processing the cans, and wash the jars and lids you'll be using. 

  • When the water in the canning pot is hot, you slip the jars in to keep them hot and sterilized until you ladle in the fruit.

  • Once you've put the fruit in the jars, you set the jars back into the boiling water of the canning pot to process. This is the part that seals the jars to make them safe for storage.

So it's not such a difficult process. It just takes a lot of pots and pans. And, as we discovered, tomatoes in particular need a lot of time to process. They're finicky fruits, those tomatoes.

Nina and I blithely set out to spend yesterday afternoon putting up tomatoes for the winter. Nina's farmshare gave her an excellent deal on tomatoes, and I picked up a few pounds more to even out the numbers. This meant that we had 40 lbs of tomatoes all together.

this isn't even all of them


40 lbs of tomatoes is a lot of tomatoes, friends. Especially if you've only canned twice before, like me, or never, like Nina. This is the point where we began to worry that the afternoon would resemble an episode of I Love Lucy.

Nevertheless, we soldiered on. We set up our army of pots (my canning pot took up 2 burners alone) and boiling water, and arranged an assembly line to peel the tomatoes and prepare them for cooking. We planned on making tomato sauce, which required 45 minutes of simmering before it could be canned, and crushed tomatoes, which only needed 5 minutes. So naturally we began work on the tomato sauce first.


However, by the time we'd finished peeling and crushing the 24 lbs meant for the sauce, the canning pot was ready for processing (understandably, since it was an hour and a half later). So we decided instead to prepare the crushed tomatoes for efficiency's sake. This took another half an hour of peeling, plus managing which pots would fit on which burners and waiting for the tomatoes to boil. We didn't actually start processing the filled cans until 3 hours into our canning adventure.

And yes, at this point we'd cracked open a couple of beers and I was sighing, "No, we can't."

Would we manage to can all 40 lbs of tomatoes before the end of the afternoon?

Would we lose our minds?

Would we not do it correctly and poison ourselves and everyone we knew with botulism?

Check back tomorrow to find out!

Monday, August 27, 2012

Supposedly delicious (II)

As I mentioned earlier, I love perusing the old cookbooks at the cottage to see what earlier generations enjoyed eating. People of my great-grandparents’ generation apparently cooked with quite a lot of lard in the 1930s, while those of my grandparents’ generation liked to cook entire meals in casserole dishes. (The 1950s and 1960s were apparently full of food fads like that.) These cookbooks are also entertaining for the quaint illustrations, like this one of a woman rolling out pastry dough in the 1960s Joy of Cooking:


I don’t know about you, but I can’t roll out dough using just my index fingers.

A number of the 1940s cookbooks claim American home cooking as the one thing that will win the war. The introduction to Cook It In A Casserole, 1943, argues that by forcing a wartime economy on America, Hitler is encouraging Americans to return to the good old casserole: “the oldest and the most satisfactory mode of cooking.”

And of course, there are also a few recipes that give me pause. Where I think to myself, Did readers actually eat that? And what does it taste like? (This is the moment where I contemplate making it myself. That moment is usually short.)

Of course, I know that many people still happily consume organ meat today, so I’m not trying to be critical. But as a young Western cook of the 21st century, I’m often surprised by how quickly food fads have changed.

So what do you think? Would you try any of the recipes below?


  • Baked Brains and Eggs (from The Joy of Cooking, 1967). The way the recipe title rolls off the tongue reminds me of the Monty Python Spam skit.

  • Heart Pie (from Cook It In A Casserole, 1943). Sounds quaint, right? Heart pie for Valentine’s Day? Oh wait.

  • Frizzled Beef a la King (from Cook It In A Casserole, 1943). It’s basically dried beef cooked with veggies, milk, and sherry. But why is it “frizzled”?

  • Scrambled Brains (from The Boston Cooking-School Cook Book, 1930). Scrambled eggs for breakfast plus a special ingredient.

  • Frozen Cheese Salad (from Meals Tested Tasted and Approved, 1930). Cream cheese + mix-ins, which actually sounds promising. But the title doesn’t.

  • Whale (from The Joy of Cooking, 1967). The editors begin with: “Last—but vast” and go on to describe how you have to cook it like beef, “which it resembles more than it does fish.” I can’t picture a Midwestern, suburban white family of the 1960s sitting down to a meal of whale. I do want to try whale, but unless I visit a northern Native American reservation, that probably won’t happen anytime soon.

Friday, August 24, 2012

Special vacation edition: Cinnamon buns, or snails


During my mom’s senior year of high school, her family hosted a Norwegian exchange student, and they’ve stayed in touch with her ever since. Fast-forward many years later to when I was in middle school: we were lucky enough to visit this Norwegian friend and her family on their small island in Norway (there’s a theme here somewhere). While much of that trip is obscured in my memory by my own awkwardness (it was middle school, remember), I do recall the amazing food we ate there. My mom’s friend made these flaky butter biscuits with seeds on top, and before we left I asked her for the recipe. She said something along the lines of, “Make the dough and put butter on it, then roll it out and put more butter on it, and keep doing that.”

Not very specific, but all you need is that general principle: roll copious amounts of butter into dough and it will bake up light and flaky. Our favorite Providence bakery follows this idea to the letter.

And it only took me 10 years to actually try it myself!

The base for these cinnamon rolls is a Scandinavian coffee cake, which becomes light and flaky after it’s been rolled with butter and left alone to contemplate the joys of milk fat. I like to think that if I hadn’t gotten out of control and sprinkled cinnamon sugar on top, too, this dough would have turned into something very like those buttery Norwegian biscuits. But in the end, I don’t really care that much. These cinnamon buns are amazing.

However, there were just a few slight problems while baking. Remember how we have to adapt to our circumstances as we cook at the island? Well, during the making of these buns I...

  • discovered that we had no white sugar (so I pounded up some raw sugar cubes)

  • learned that 1960s cookbooks still gave yeast measurements as “1 cake compressed yeast” (so I made an educated guess)

  • thought that we had no rolling pins (so I used a beer glass)

All in a day’s baking, though, right? Just think, when you try out this updated recipe in the comfort of your modern kitchen, it will seem downright easy. Or at least it will to me, when I make these again.

Because I will be making these again. These cinnamon buns are glorious. The copious amounts of butter may send the Wellness Brigade into hysterics, but hey, it’s vacation (as I justified it). They’re as flaky and light as those Norwegian biscuits, and just sweet enough to feel like a dessert or a sinful breakfast.

Lesson learned: those Norwegians (and 1960s American Joy readers) know how to live.

especially if you enjoy it with a cold brew

Cinnamon Buns (Snails)
(adapted from The Joy of Cooking, 1967 edition)

for the dough:
2 eggs
¾ cup warm water
2 ¼ tsp active dry yeast
4 cups all-purpose flour
1 tsp salt
2 tbsp sugar
2 cups butter, divided

for the filling:
1/3 – ½ cup brown sugar
1/2 – 1 tsp cinnamon

To make the dough:
Beat the eggs together in a small bowl, then add the water and the yeast. Stir to dissolve and let sit in the refrigerator for 15 minutes.

Meanwhile, mix the flour, salt, sugar, and ½ cup butter together until well blended. When the yeast mixture has proofed, make a ring of the flour mixture in the bowl and pour the yeast mixture into the center of the bowl. Stir to combine. With your hands, knead the dough for about 2 minutes, until most of the floury bits are incorporated. Cover the dough and let it rest in the refrigerator for about 20 minutes.

Beat the rest of the butter until it’s creamy, and prepare a floured surface. When the dough has rested, turn it out onto the floured surface and roll into an oblong shape about ½ inch thick. With a knife, smear about ¼ of the butter onto 2/3 of the oblong dough, like so:


Then fold the unbuttered third of dough onto the center third, and fold again over the last third. The dough should look like a pamphlet. Rotate it 90 degrees and roll out the dough again to 1/2 inch thickness, and repeat with the next ¼ of butter. Continue to fold the dough, rotate 90 degrees, roll out, and cover with butter until you’ve used all the butter. The dough should then have been rotated 360 degrees and rolled out and buttered four times. Put the dough back into the large bowl, cover, and refrigerate for 2 hours or until doubled in bulk.

When the dough has doubled in bulk, turn it out onto the floured surface and roll into an oblong shape about ¼ inch thick. Spread with butter (just a little will do at this point) and sprinkle evenly with brown sugar and cinnamon. Roll the dough over on itself like a jelly roll, and lightly pinch the loose ends to seal. Cut into 1-inch slices. Grease 2 muffin tins and place each slice at the bottom of each muffin container (you can squash them in if necessary). Sprinkle with brown sugar. Preheat the oven to 350 F and let rise for 30 minutes.

Once the buns have risen, bake for 30 minutes, or until golden brown.

Tuesday, August 14, 2012

Special vacation edition: Brown sugar blueberry pie


We’ve just returned from a relaxing week with family on Georgian Bay in Ontario, Canada. My mom’s side of the family has been spending summers up here since the 1940s, when my great-grandfather (appropriately named “Granddaddy”) built a boathouse on the island he’d just purchased. The island has since grown to include a main cabin and two smaller cottages, but the cabins themselves haven’t changed much since the 1940s. Think bare beams, no insulation, and nights where all you can hear is the overwhelming chirp of crickets and the creak of the docks. It’s in the middle of nowhere and we like it that way.

And if you haven’t guessed by now, I also like the fact that so little has changed since the 1940s. But I’m reasonable: I like having electricity and running water, and indoor plumbing. My mom grew up here with outhouses and kerosene lamps, but that’s a little too prehistoric for me.

Gasp! I actually enjoy some modern conveniences!


Anyway, my sister is determined to march our little cabin into the modern age, step by refurbished step. So this summer we’ve replaced a few ancient mattresses with brand-new pillow-top dreams, and Lissa’s put up new curtains and laid out fresh bedspreads. My dad strung up new lamps to hang in the porch so we can read at night. All these changes add some much-needed freshness to the place, and I like it. But I also love the things that stay the same. These are the little details that I grew up with every summer, and the ones I greet like old friends each time I visit.


There are the kerosene lamps the family converted into electric lights. The reed pump organ supplied only with old hymnals and compilations of folk songs. The collection of baskets woven from dyed porcupine quills. The sketchbooks filled with drawings and watercolors done by my grandmother and my own mother. The old comics from the 1970s—Archie, Richie Rich, and Batman—that my sister and I used to reread every summer, because they’re just so much different from (better than) today’s comics (and Archie wears bellbottoms!). The wooden boats we sailed at the sandy beach when we were little.

And, of course, the old cookbooks.

There’s quite an interesting collection up here. It’s small but reflects the changing values of each generation: the Fannie Farmer from the 1930s, the “Cook it in a Casserole” special of the 1950s, the classic Joy of Cooking from the 1960s, and more recently, one of Mark Bittman’s tomes. Before I started this project, I used to peruse the cookbooks and delight at the copious amounts of lard the 1930s cookbooks would call for, or the occasionally bizarre recipes found even in Joy (more on that in a few days). This year I came with a mission: to use one or two of these cookbooks and to report the results back to you, my devoted readers.


The first report is on an old classic that I’ve presented here before: blueberry pie. We always make a blueberry pie at the island, often with berries we picked ourselves. Sadly, there weren’t any berries growing when we arrived, so we made do with store-bought. And since there wasn’t any white sugar at our tiny local grocery store, I turned it into a brown sugar pie. But the family, fresh from swimming, pronounced it delicious.

It’s fitting, then, to open the special vacation edition with this kind of pie. It reflects the adaptations and adjustments we make each year at the island, when we realize we’re out of this ingredient or can’t find that utensil. It also reflects the somewhat odd 1960s habit of making pie crust with flour paste. But who cares when it tastes so good?


Brown Sugar Blueberry Pie
(adapted from The Joy of Cooking, 1967 edition)
makes one 9-inch pie

for the filling:
4 cups fresh blueberries
3-4 tbsp flour
2/3 cup brown sugar
½ tsp cinnamon
1-2 tbsp butter


for the crust:
2 cups all-purpose flour
1 tsp salt
¼ cup water
2/3 cup butter

To make the filling:
Rinse and drain the blueberries, making sure to pick them over for leaves and stems. Place the berries in a large bowl and sprinkle with the flour, brown sugar, and cinnamon, and mix gently. Let sit while you make the crust.

To make the crust:
Preheat the oven to 450 F. In a large bowl, mix the flour and salt together. Remove 1/3 cup of the flour mixture to a small bowl and add ¼ cup water, mixing to form a paste. To the remaining dry flour mixture, cut in the butter with knives or work it in with your fingertips. Once the grain is the size of peas, add the paste back into the dough and mix with your hands until the dough forms a ball. You may need to add a little more water to make sure it comes together.

Turn out the dough onto a floured board and separate into two balls. Roll out the first ball into a circular form slightly larger than the bottom of a 9-inch pie pan. Fold the dough in quarters and place in the pie pan, unfolding to cover the pan. Cover any gaps with extra dough. Pour the filling into the pie dish and dot the top of the filling with the remaining butter.

Roll out the second ball of dough as you wish. I like to make a lattice crust: roll out the dough into an oblong shape and use a knife to cut the dough into long strips about ½ inch wide. (See vintage 1960s diagram at left.)


Lay the strips over the filling in one direction, then in the other, making sure to weave them together into a loose lattice. It’s okay if the strips break; you can mush them back together with your fingertips.

Bake the pie at 450 F for 10 minutes, then reduce the heat to 350 F and bake for 35-40 more minutes.

Friday, August 3, 2012

Away


For the next week, I'll be enjoying some time with family in Ontario, Canada. There will be lots of swimming, canoeing, picnicking, reading, and, of course, cooking. I'll be back soon with more recipes and stories. Hope you're all enjoying August so far!

Monday, July 30, 2012

Kitchen garden (IV)


It's been pointed out to me since last week's post that my memory is playing tricks. We didn't sing "Summertime" in high school, we sang it in middle school...with my friends, not my sister.

Maybe it's because I'm too busy thinking about my tomatoes. And that little guy above. He's taken up residence between two tomato cages, and he's a stubborn one. So after trying to discourage him several times, I decided to let him be. And now I'm glad I did.

I've been on the road these past few weeks, shuttling between Ohio and Rhode Island and Maine and Connecticut and New Jersey (sometimes with the little hamster in tow). These travels have been alternately exhausting, difficult, and relaxing. I haven't always had time to worry about how my plants will get watered while I'm away. And despite a wonderful week on the lake in Maine, and a fun wedding weekend with family, nothing warmed my heart quite like coming home to my beautiful tomatoes, which have finally sprouted fruit.


I'm hoping to harvest that first red cherry tomato before Josh and I leave for Ohio (once again), bound for a family vacation in Canada. And meanwhile I'll just enjoy peeking in on the tomatoes in between travels, watching them ripen.

Previously:

Thursday, July 26, 2012

Lemonade


High summer in Rhode Island. The days are long and sticky and oppressive (but not as humid as Ohio, where summer can feel like you're swimming through tar). Although the mornings are cool and breezy, they burn off quickly once the blazing sun gets going. If you're out for a walk, you probably spend it hopping from one spot of shade to the next.

This kind of heat always makes me think of that Gershwin song from Porgy and Bess, "Summertime." You know the one: "Summertime, and the livin' is easy." My sister and I sang it a few times with our high school choir, and I remember our choir director telling us to slow it down, to saunter through the song. You can't rush a song like this. You have to imagine you're sitting on a porch in the twilight, shooting the breeze with a friend. Of course, try telling that to a bunch of high school girls who are always thinking of something more exciting than sitting on the porch in the summer.


Now I get it. I like the ease of having nothing in particular to do, of ambling through the day because there's no helping the heat. Every year around this time I get the urge to sing "Summertime" to my sister (we have a relationship full of musical clips and BBC quotations), just because it captures this season like nothing else. The words slip out slow like molasses, and your voice slides from one note to the next. It's the perfect song for summer.

And for refreshment?

Lemonade, only lemonade.

This is one of the simplest recipes I've ever made on this blog. You just need water, sugar, and a fresh lemon. It's a slow and easy recipe, like the Gershwin song. You can let the water and sugar take its time to dissolve, and squeeze in the lemon juice at the last moment. You can chill it overnight or just pour yourself a glass right there. It's a fairly sweet drink, so you might want to reduce the amount of sugar. It's up to you.

Of course, in my opinion there's only one right way to serve this lemonade. On the porch in the twilight, listening to Ella and Louis sing about summer.


Lemonade
(slightly adapted from The "Settlement" Cook Book)

1 lemon
3-4 tbsp sugar
2 cups water

Heat the water just until boiling, and pour over the sugar. (You may want to start with 3 tbsp and adjust to taste once you've added the lemon.) Stir to dissolve, and let sit until cool. Squeeze the juice of the lemon into the sugar water, and stir to combine. Add sugar to taste. Strain the liquid to remove any seeds or pulp. Chill overnight, or pour yourself a glass over ice.

Monday, July 9, 2012

Mint julep

Now that summer (with all its heat and humidity) is in full swing, my sister Lissa has been contemplating what would make the weather more bearable. There's swimming, long afternoons in Starbucks, evenings at the air-conditioned movie theater.* There's also the tried-and-true tradition of iced mixed drinks. Every few days, she sighs wistfully, "Wouldn't it be nice to be sipping a mint julep on a Southern porch?"

she's up to something

Yes, it would be nice. In fact, we can sip mint juleps right here on our Ohio porch. Except for the fact that Lissa doesn't drink alcohol.

Despite this drawback, I decided to make mint juleps anyway. Lissa could imbibe in spirit (hah), while my dad and I enjoyed a refreshing cocktail. So I flipped open the "Settlement" book to its recipe for "Mint Julep."

Then the trouble began.

You know how I've occasionally had to do complicated mathematics to figure out measurements? And how I rejoiced that this "modern" cookbook gave you all of the measurements so you didn't have to work too hard? Not so for mint juleps. Here is the recipe in full:

Large Thin Julep Glass--Dissolve one teaspoon fine sugar in water, one dash Maraschino, one glass whiskey or brandy as preferred, four or five sprigs mint held to side of glass, leaves up. Fill up with fine ice and do not bruise the mint. Trim with fruits. If preferred mint can be bruised, but above is the regular Southern julep.

Oh, it's all fine and dandy until you get to the "glass" of whiskey or brandy. How big is a "glass"?

So I turned to my trusty Joy of Cooking for advice. But the mystery only deepened, for Joy instructed:

Pour into bar glass: 1 large jigger bourbon whisky

"Jigger"?

Add more ice to within 3/4 inch of top of glass. Add: 1 pony whisky

"Pony"?

For the first time I began to regret that I don't drink cocktails. If I did, perhaps I'd know the lingo. Apparently you don't have to go back in time to find hard-to-decipher recipes.


Finally, after much searching, I discovered a handy table in Joy that explained that 1 "jigger" equals 1 1/2 oz, not to be confused with the "large jigger" (2 oz), while a "pony" equals 1 oz. So after cross-referencing the modern recipe with the 1903 recipe, and discovering that our liquor cabinet had only brandy, and converting the weird bar slang to actual measurements, and failing to crush ice from our freezer, I managed to make two mint juleps, one for me and one for my dad. Lissa supervised the proceedings, though she did not taste the results. And indeed, the drink was refreshing, cool and minty.

Lest my sister ever complain that I'm not nice enough to her, let this be a testament to my devotion: I'm willing to battle multiple recipes and cabinet shortages to make her a cocktail she won't even drink.

But that doesn't mean it wasn't fun.


Mint Julep (1903 Version)
(adapted from The "Settlement" Cook Book and Joy of Cooking)
two servings

for the sugar syrup:
2 tsp sugar
1 tsp hot water

for the drinks:
6 oz brandy or whiskey, divided
9-10 sprigs mint, plus more to garnish
ice to fill (it's supposed to be crushed, but I liked it with regular ice)

Make the syrup: mix the sugar and water together in a small bowl until dissolved.

Make the drinks: divide the syrup equally into two tall glasses (if you don't have julep cups, you can use tall bar glasses). Squeeze the mint in your hand to release some of the oil (a nice compromise between bruising and not), and place 4-5 sprigs, leaves up, in each glass. Pour 1 1/2 oz brandy or whiskey into each glass. Fill each glass with ice until 3/4 full. Pour another 1 oz brandy or whiskey into each glass, and stir to combine. Garnish with extra mint leaves.

Serve on a porch in the twilight.


* Except when the entire movie theater loses power. Like it did last week when we were one hour into Spiderman.

Thursday, July 5, 2012

Fourth of July Kuchen tarts

Right now I'm in Cleveland, enjoying a week with family and quiet mornings of blazing heat. While I love Providence, it's wonderful to escape from a city (even a small one) for a time. I get to remember what it's like to walk down the street hearing only the cooing of birds and the rustle of wind through the trees.

Plus, there's nothing like spending holidays with family, the Fourth of July included. We spent yesterday morning with my aunt and uncle and cousins, enjoying the local parade (and trying to stay cool).


Then we escaped back to the dark, cool house and set to the important work of preparing the evening barbecue. And because I can never ignore an excuse to bake, I made kuchen tarts.

My sister Lissa just finished her first year of a master's program in art history, and she spent her June taking German to pass her language qualifications. She is now the German expert of the family, and she tells me that kuchen (pronounced KU-khuhn, not KU-ken) means "cake" in German.

I made cake tarts!


There is absolutely nothing wrong or indulgent about that sentence.

(Lissa also speaks to me regularly in German. This is frustrating for two reasons: 1. I don't speak German, aside from the random phrases I've picked up from war movies. And 2. We used to speak to each other in Franglais, a broken form of French + English. She has left our Franglais behind for more exotic languages.)

Linguistic regrets aside, these tarts are amazing, as one might expect from something called "cake tarts."


They're made from a basic coffeecake-type dough, yeasty and sugary with a hint of nutmeg. Once you've let the dough rise, you can make all sorts of magical kuchen, from cakes filled with cinnamon and sugar to those filled with crushed poppy seeds and fried to perfection. Lissa tells me that modern kuchen aren't very much like those described in The "Settlement" Cook Book, but hey, it was 1903. We're using recipes that came over from Germany back in the 1840s and 1850s.


The kuchen tarts I chose feature a dollop of jam in the middle, perfect for Fourth of July color-coordination. I alternated between strawberry and blueberry jam to make a red and blue theme. Sadly, some of the jam melted off the tarts in the oven.

Later I discovered that you're probably supposed to put the biscuits in a cake pan so they sort of meld together like pull-apart coffeecake. But those are the mistakes you make when you're working from old-fashioned, unclear recipes that say only "place close together in a buttered pan."

But despite these drawbacks, the tarts were still delicious.


And my family only made a few jokes about the pronunciation of "kuchen."


Almost Kuchen Tarts
(adapted from The "Settlement" Cook Book)

For the dough:
1 cup milk
1/4 cup unsalted butter
1/4 cup sugar
1/2 tsp salt
pinch of nutmeg
1 beaten egg yolk (save the white for another purpose)
2 1/4 tsp active dry yeast (or 1 package active dry yeast)
3 1/2 - 4 cups flour

For the filling:
1/2 cup your choice of jam (I used 1/4 cup blueberry and 1/4 cup strawberry)

Scald the milk over medium heat (this means to heat it until small bubbles form around the edge, then remove from heat). Let cool to lukewarm. In a small bowl, mix the yeast and 1/2 tsp of the sugar, plus 1/4 cup of the lukewarm milk. Set in a warm place to proof. (You'll know it's working when the mixture puffs up like a sponge.)

Meanwhile, add the butter, the rest of the sugar, the salt, and nutmeg to the rest of the milk in the pan. Stir in the beaten egg yolk. Add the proofed yeast mixture and combine thoroughly. Add the flour one cup at a time. You may only need 3 1/2 cups, but add as much flour as you need to make a smooth, elastic dough. Transfer the dough to a large bowl, cover, and let rise until doubled in bulk. (This usually takes about an hour, but if it's as hot as it was yesterday, it may only take twenty minutes.)

When the dough is ready, punch down and transfer to a floured board. Roll out the dough to about one inch thickness, and cut with a biscuit cutter. Place the biscuits on a buttered cookie sheet and let rise until light, about twenty minutes.

Meanwhile, preheat the oven to 425 F and set out the jam filling. When the biscuits have risen, poke a hole in the center of each biscuit and drop in a spoonful of jam. Once you've filled all the biscuits, bake at 425 F for 10 minutes. Reduce the heat to 350 F and bake for another 5-10 minutes, until browned.