Showing posts with label winter. Show all posts

Tuesday, January 28, 2014

Winter is coming


But really, it's here.

Last weekend Josh and I hosted two separate gatherings of friends to play the Game of Thrones board game. This is a complicated, multiplayer game where folks play as the houses (House Stark, for example) from the books by George R.R. Martin. Each house aims to capture seven castles, all while dealing with betrayal, vicious fighting over single pieces of land, and lots of jokes about Valyrian steel.

Here's where I confess.

I'm in the midst of both reading and watching Game of Thrones, and it's tons of fun. Josh blazed through all the books a few summers ago (and suffered through a major, inadvertent spoiler), and watched the entire TV series about as quickly. I am traditionally pretty measured in my approach to media: I don't binge-watch TV shows, I like to space out my installments of beloved book series. Right now I'm gearing up to watch the second season and read the third book (because of course, it's best to read first, then watch). George R.R. Martin has done a fabulous job constructing a complicated world with compelling characters, and even though it's sometimes hard to keep track of everyone, the first two books have been immensely fulfilling.

So yes, playing as House Baratheon was pretty great. Even better was playing with Josh's personalized deck of cards, which he developed over winter break. We also brewed some medieval spiced wine, which, while not technically of Westeros origin, might very well have been served at Ned Stark's banquets. It was warm and toasty and spicy and did the trick on a cold winter's night.


All Stark jokes aside, though, I've been having a rough time with winter this year. Sure, I love snow days, and tramping around in freshly fallen snow is satisfying in a way I can't describe. But there's something about the bleakness of the days, the gray skies and biting wind, the fumbling with keys while you still have your mittens on, the inability to just sit on the porch and enjoy the day because the weather sucks, that gets to me. After the hustle and bustle of the holiday season, January and February are bitter. It was great fun to sit inside over a board game, but now that the workweek is once again upon us, it's hard to be interested in much of anything when the weather's like this.

In the meantime I'll make some more spiced wine and watch my narcissus grow. Spring has to be on the way, right?


Spiced Wine (Hypocras)

4 cups red wine (roughly one bottle)
5 tbsp sugar
2 tsp powder douce (recipe follows)

First, make the powder douce: mix 3 tbsp ginger, 2 tbsp sugar, 1 1/2 tbsp cinnamon, 1 tsp cloves, and 1 tsp nutmeg together in a small bowl.

Next, pour 2 tsp of the powder douce, and the sugar, into a saucepan. Mix in the red wine. Warm over medium-low heat until steaming. Serve in cozy mugs.

Monday, January 6, 2014

Colonial Craft: Pomanders


Happy New Year! I hope you had a wonderful holiday season and that you're settling into 2014. I spent Christmas with my family in Ohio, listening to my dad's beloved Ray Conniff Singers and cooking up a storm. We spent many an evening by the fire and even processed maple syrup in one long day of patient boiling and simmering.


I also had a rather crafty evening in front of a Doris Day movie, and that's what I want to share with you now. I made pomanders: fruit studded with cloves and rolled in spices.


Pomanders originated in the Middle Ages, when folks would melt spices and aromatics together and enclose the resulting mass in perforated cases. They then wore these around their necks or carried the cases with them to ward off plague or disguise body odor. In the 17th and 18th centuries, the English began to make pomanders the way we think of them today, poking oranges and apples with cloves and rolling them in a mixture of spices and preservatives. Early immigrants to North America brought this craft with them as a Christmas or New Year's custom, but as oranges were far too expensive (they had to be imported), colonists typically made their pomanders with apples.


In researching the history and construction of pomanders, I was pretty surprised by this last fact. Like many women my age, I grew up with the American Girl dolls, and Felicity (the colonial-era doll) had a book of colonial crafts for girls to make. One of the crafts was, of course, a pomander made with an orange, but it turns out that very few colonial girls could have used oranges for their crafts. American Girl lied to me! Or, perhaps, glossed over the more complicated truth; Felicity very well might have been able to afford an orange, as her father owned a general store and would have had immediate access to imported produce. But her friends? Probably not.


Despite this disillusioning discovery, I enjoyed making the pomanders. I chose to make a "real" pomander out of an apple, spiking it all over with cloves and rolling it in a mixture of cloves, cinnamon, ginger, nutmeg, and orris root (a preservative that helps it last). The other adhered to my childhood understanding: a simple pomander made with an orange, with only a decorative pattern of cloves. This one won't last very long.


They both make my apartment smell quite nice, however, and I'm looking forward to keeping the apple pomander for years to come. If you'd like to make your own, here's the recipe I used.


Pomander
(slightly adapted from InSeason)

1 apple or orange
several ounces of whole cloves (varies)
1 tbsp cinnamon
1 tbsp cloves
1 tbsp ginger
1 tbsp nutmeg
1 tbsp orris root

Mix the ground spices together in a small bowl. Set aside.

Press the whole cloves, sharp side down, into the fruit. You can make a pattern, or if you'd like the pomander to last as long as possible, keep the cloves close together and cover the fruit with them.

When you've finished with the whole cloves, roll the fruit in the spice mixture. Store in a cool, dry place, still in the spice mixture, until dry. Make sure to roll the fruit in the spice mixture each day.


Works cited: White Lotus Aromatics newsletter. InSeason: Making Traditional Pomanders.

Thursday, February 28, 2013

Maple sugaring (II)


Last week I wrote about my family's maple sugaring tradition. Today I'll add an amendment: while we love most of the maple sugaring process (tapping trees, collecting sap, boiling it down in the evaporator), we have a hard time with one part: finishing the syrup.

This is the part where the syrup has been boiled to the right consistency, but you have to filter out the minerals and sediment in order to package it. First you heat up the syrup to the boiling point, and then you run it through a wool filter. It's a long and slow process, mostly because the syrup gets all gummed up in the wool filter (what with residue and all that). Once you finally have enough syrup, you have to heat it up again in order to hot-pack it. Still, this is nothing more than filling fresh pint or quart bottles and sealing with a special cap. It's much less involved than canning.


So yes, my family loves one long and slow process (boiling), but somehow we can't make ourselves love another long and slow process (filtering). I know, I know. The idiosyncrasies of the human mind!

As a result, we've made syrup for years without going through that final step. Since the syrup's never been hot-packed, we have to keep it in the freezer. So we have a freezer full of maple syrup.


Ah, problems.

Just before I flew back to Rhode Island, my dad and I spent an afternoon and evening filtering and packaging a few quarts of syrup. We discovered it's best to do this when you can walk away for a while; that way, the intensely slow drip of the filter won't drive you completely insane. In fact, it was actually kind of fun.

But while this process may seem extremely old-fashioned and back-to-the-land, it's actually a "modernized" version of the earliest maple sugaring. The Chippewa and other Northeastern Native American tribes were the first to harvest maple syrup, long before the Europeans set foot in North America. The Chippewa collected sap in much the same way as we do--a makeshift spile let sap drip into a bucket, and it was boiled until syrupy--but they created a different end product. Instead, they turned most of the syrup into granulated maple sugar, which was more easily stored throughout the year. By working the syrup in a special trough, they could turn it into fine granules that were then stored in birch bark containers. The Chippewa drew on this store throughout the year for ceremonies and special meals.

No matter which way you finish, maple sugaring is a labor-intensive process that shows you where your food comes from, beginning to end. And that's something to savor.

Thursday, February 21, 2013

Maple sugaring


In our family, February and March are the maple syrup months. Temperatures dip to freezing at night and warm up during the day, so the sap runs easily from the trees. Evenings are spent out in the sugar shed, boiling sap down to golden syrup in a gas-heated evaporator. On weekends, we enjoy pancakes with maple syrup fresh from boiling.


My parents started this grand maple sugaring experiment the year I was born. Initially it was a small operation: one or two taps in the trees, yielding just enough sap to boil on the stove. My dad reminisces wryly about the time he forgot the sap on the stove while he was painting the nursery, and the pot boiled over into a sticky, burnt mess. Since then the project has slowly grown. My dad transitioned to a secondhand evaporator (a channeled metal container that heats up the sap evenly), and we invited my first-grade class over on a field trip. (Fifteen little first-graders standing very close to a hot metal evaporator...there was at least one melted winter jacket.) We helped tap trees and ate cornbread with fresh maple syrup.


After we moved to a new house, the improvements continued: refined heating apparatuses, a new evaporator, special sets of plastic bags to collect the sap. We've visited bigger farms during Maple Madness, Northeast Ohio's maple sugaring festival (yes, it's that big here). We've seen a huge farm that collects sap via plastic tubing, with special machines that jump-start the boiling process; we've shyly toured an Amish operation that heats entirely with wood. There are so many options for processing sap, and yet there's nothing I love more than our own.


Dad's trying out bright blue polyethylene bags this year. They're not as scenic as those metal buckets you see in postcards, but they're much easier to empty. When we've collected enough, we hike back to the red sugar shed in the backyard to start boiling. In some ways, this shed is the culmination of this ongoing project: a rustic space set aside just for maple sugaring, warmed by a wood stove. When I was in high school, Dad set up a radio and speakers out in the shed so we could listen to the oldies station and sing along while we watched the sap. I've since run off with that radio, but standing around in the quiet listening to the sap boil is perfect in a different way. We have a chance to talk, and sometimes Mom hikes down to take photos, and I get the sense that this is one thing that will never change.


Monday, February 18, 2013

Staying warm


I flew back home to Ohio on Saturday night, and after staying up far too late talking with my parents, we discovered that the house had its own welcome-home present to offer: a broken furnace. Plus, Northeast Ohio was going through a cold snap...which meant the temperature could get down to a bracing 3 degrees F at night.

Adventure!

My dad quickly took charge, being the engineer and all-around handyman of the family. He soon learned that we couldn't get the part needed to fix the furnace until Monday morning, so we would have to wait out Sunday in an increasingly cold house. He and I trekked out to Sears to purchase three oil-filled space heaters, which took all of five minutes to set up and plug in. We couldn't light a fire in the fireplace because the heat would actually suck warmth out of other parts of the house. (If we had a wood stove, that would be a different story.) So we all bundled up in sweaters, vests, and blankets, and turned on the faucets to keep the pipes from freezing. But we had a bracing day. As my mom pointed out, while trying to warm up her hands after scrubbing pans in very cold water, "I think this is how you get chilblains!"

The repairman just left, so our furnace is up and running again. And all in all, we weren't that uncomfortable. But this adventure made me wonder how people warmed themselves in the past. So I did some research, and here's what I found:

  • A roaring fire in the fireplace was the best way to stay warm in colonial America.
  • When it was time for bed, you could take the warmth of the fireplace with you by filling a warming pan with hot coals and snuggling it under the covers.
  • If there were cracks in your cabin, you could dab on some clay to keep the wind (or snow!) from whistling in.
  • In the 17th, 18th, and even 19th centuries, folks took foot stoves with them on frigid carriage rides or to church on Sundays. They were basically boxes filled with hot coals. You could also take a hot stone with you if you were poor.
  • Layer! Long underwear, woolen petticoats, thick stockings, and quilts all kept the chill out.

Personally, I'd kind of like to have a warming pan to take to bed on chilly nights. What about you? How do you keep warm in the winter?

Friday, February 8, 2013

Scarlet fever and other Little House stories


We're battening down the hatches here in Rhode Island: there's a blizzard on the way! Josh and I both have a snow day (it never gets old), and we're planning on waiting out the storm with movies, books, and cinnamon rolls fresh from the oven.

Winter storms always make me think of Laura Ingalls Wilder's The Long Winter, where the Ingalls family (and Almanzo Wilder) have to weather a brutal winter in the Dakota territory. We're not slated to get 11 feet of snow as the prairie did that winter (yes, really!), but when the snow drifts pile up, I can't help but think of Pa tying a rope to the barn so he can feel his way back to the cabin in the driving snow. What is it about those books that sticks with you long into adulthood?

There's been some buzz in the news recently about a pediatrician who uncovered the medical truth about Laura's sister Mary losing her sight after a bout of scarlet fever. The cause of Mary's blindness is mentioned only briefly at the beginning of By the Shores of Silver Lake, but it's devastating. How can an illness, one that kids still get today, make you go blind? I remember struggling with that concept as a child. The pediatrician did, too, but during her medical rotations she learned that it was impossible for scarlet fever to cause blindness. So she set off to uncover the truth.

You can read or listen to her discoveries on NPR, and it's a fascinating story. What might otherwise be a minor family tragedy stayed with countless young readers for generations, and encouraged one of them to dig into the past.

I'll be thinking about this story today, and lots of other more wintry stories from Little House. What Little House tales have stayed with you?

Monday, January 28, 2013

Planning the garden


Today I taught my first session with a new group of students: little guys (to me, anyway), 4th - 6th graders. We talked about reading and books and the program we'll be starting tomorrow. The kids were fun, energetic, and so genuine. I always maintained that I could never teach anyone younger than 7th grade, and yet...I'm looking forward to this semester.

I don't want to get all cheesy on you guys and talk about new beginnings and whatnot, but with January being so gloomy, it's hard not to dream about a fresh start. And since I'm in the middle of a crash-course fresh start at school, I've been thinking about beginnings in other areas of life, too. Lately of the green variety: the garden.

Last summer I tried out container gardening for the first time, ambitiously calling it my "kitchen garden." There were tomatoes, spinach, snap peas and lettuce. The squirrels probably enjoyed more of its bounty than I did. And yet there was something so satisfying about growing a tiny garden from start to finish. I watched my little seedlings obsessively, bending down to check on them every morning, and when they moved to bigger containers I stuck my finger in the soil every few days to make sure they had enough water. My dad and I traded tips on growing the best tomatoes. When autumn arrived and it came time to clean out the pots for next season, my heart ached a little bit.

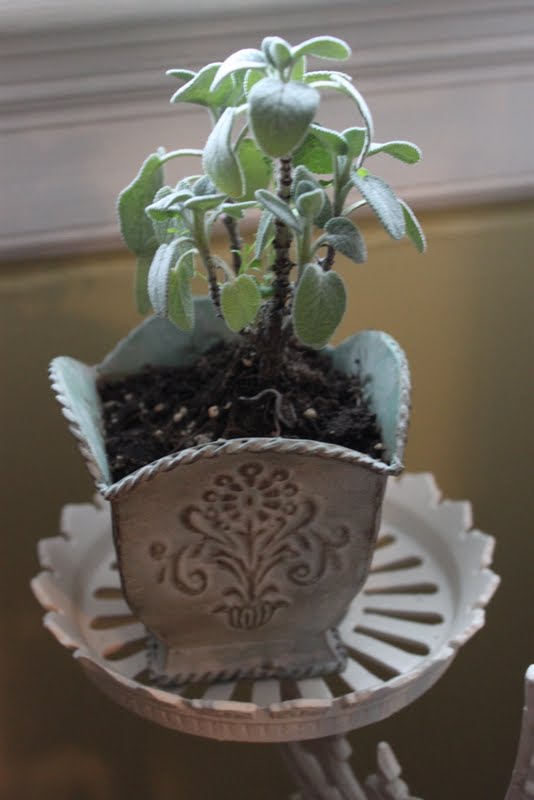
But! Now it's time to plan for this coming season. I've hunkered down in the dining room with library books and an organic gardening text recommended by a friend. I'm taking notes on what plants to grow together and what seeds to order from catalogs. And over the weekend I fell for a few pots of herbs at the farmers' market, because who wouldn't? They now sit on my great-grandmother's plant stand in the living room.


So here's my tentative plan, in containers once again:
  • snap peas
  • peppers
  • kale and spinach
  • carrots
  • herbs: parsley, sage, rosemary, and thyme (try growing those together without breaking into song); lavender, oregano, cilantro, and dill
  • flowers, just because

Ambitious? Yes. Doable? Uncertain. But planning the garden makes January a little less gloomy, and there's something to be said for that.

Are you planning a garden? What will you plant?


"Field Notes" notebook: Column & Stripe.

Thursday, December 27, 2012

Dining at Downton: How to serve plum pudding


We had a relatively quiet Christmas here in Ohio, seeing family and telling funny stories and going for long, snowy walks and eating good food. As per tradition, we served plum pudding for dessert on Christmas night, along with a lot of other treats (frosted cookies, red velvet cake, petit fours...). We don't mess around with dessert.

As I mentioned a few days ago, the serving of plum pudding is half the fun. Once you've steamed the pudding so it's nice and hot (2 hours at 350 degrees, back in the mold and the double boiler you set up to cook it the first time), you turn the pudding out into a heat-resistant dish. Heat up a little brandy on the stove, pour it evenly over the pudding, and hold a lit match close to the pudding. The fumes from the brandy should pick the flame right up and set the whole pudding alight. In a darkened room with all the family sitting around a candle-lit table, there's nothing quite like it: blue flames dancing around the dish, creating a magical feeling.


Unfortunately, our evening did not go exactly according to plan.

The brandy we ended up using was just too old, so the flames died out almost immediately. Here is the only picture we could get of bringing the pudding to the table--if you look closely, you might see the blue flames as they dwindled to nothing.


That doesn't mean the pudding wasn't delicious, though! The days it spent ripening in the cold did it good, and the pudding was light and fruity with a citrusy zing. It had a tender, spongy crumb that contrasted well with dabs of rich hard sauce.

If you celebrated the holidays this December, I hope you enjoyed equally delicious food and fun company. (I also hope that your projects went a little more according to plan than mine!)


Previously:

Monday, December 24, 2012

Dining at Downton: How to steam plum pudding

On Saturday we talked about how to make your own plum pudding, the most classic of British holiday desserts. (Yes, I am still wondering where the plums are in the recipe.) Today we'll discuss the cooking process, which is a rather elaborate steaming method. It requires parchment paper, cooking twine, a water bath, and lots of patience.

My dad was fascinated by the process from start to finish. He's an engineer by trade, and he's the kind of cook who loves the science of the kitchen. He will turn out renditions of his mother's pumpkin pie recipe until he has the ingredient ratio just right (much to my mom's dismay). He will collect recipes for beef bourgignon and combine instructions from each to make the best possible stew. He will then exchange observations on the proper way to brown beef with me over the phone. (He also went to great lengths to find out why the one American manufacturer of plum pudding stopped producing it, which is how I ended up making the pudding in the first place.) Put simply, my dad likes method.

"You should take photos of that!" he said as I removed the steaming pudding from the water bath. "And how did you tie the parchment paper down again?"

As he noted, this is a delicate process. So here are your highly expert instructions, just the way my dad likes them.

Step One
Preheat the oven to 350 F.

Once your pudding is mixed and ready to cook, turn the mixture into a well-greased pudding mold or glass bowl. Remember, a pudding mold looks like a Bundt pan, with a ring in the middle to ensure proper steaming. I got mine at Stock, a lovely little cooking shop that recently opened in Providence.


Step Two
Next, cut a piece of parchment paper to cover the top of the mold. Leave about six inches of overhang on all sides of the mold. Fold the paper twice in the middle to create a slight overlay--this will allow steam to accumulate without tearing the paper.

Step Three
Cover the mold with the parchment paper and use a length of cooking twine to tie the paper to the mold, just below the rim. Trim excess paper.


Step Four
Create a handle for the mold, so you can lift it out of the steam bath. Cut a long length of cooking twine and wrap it around the mold as though wrapping a present, laying the twine flat across the top, bringing it down the sides of the mold and crossing underneath. Bring the twine up to the top again on the empty sides of the mold, and slide the twine underneath the cross line on top of the parchment paper. Tie the ends of the string together to create a looped handle.


Step Five
Pour hot tap water into a large stockpot or Dutch oven (I used the latter) that can accommodate the mold with at least an inch of space on all sides. Fill with water so the oven is about 1/3 full. Place the prepared mold in the Dutch oven and cover the whole thing with the oven lid. Put in the oven to steam for about 3 hours. It will make your house smell like citrus and deliciousness.


Step Six
Periodically check the oven to make sure the water hasn't evaporated completely. You may need to pour in more water. When the pudding pulls away from the sides of the mold (about 3 hours), it's done. Carefully remove from the water bath using the string handle, and lift up the parchment paper to make sure the pudding is ready. Cool in the mold completely before turning out onto a plate.

Step Seven
Now that the pudding has cooked, you can eat it straight away or let it ripen over time. If you choose to let it sit, cover the cooled pudding and store in a cool, dark place (we put it in our 1960s-era bomb shelter) until ready to eat. Pudding will keep for at least five weeks. Be sure to warm it before serving by replacing it in the mold or bowl, then steaming for about 2 hours at 350 F.

The very last segment of this culinary adventure is my favorite: setting the pudding on fire at the table! Check back in a few days for photos of our own flaming pudding. (If you want to serve your own pudding before then, warm a small amount of brandy on the stove, then pour over the warm pudding. Immediately hold a lit match close to the pudding, and the brandy will catch on fire. Bring to the table in a darkened room for maximum effect and applause. Once the flames have died, serve with brandy butter or hard sauce.)

Note: It's possible to steam the pudding with a Crockpot instead of in the oven. See this page for complete instructions.


Works cited: Irish American Mom. Pittsburgh Post-Gazette.

Saturday, December 22, 2012

Dining at Downton: How to make plum pudding

This time of year, my family is all about tradition. Previously I wrote about the Brunswick stew we've kept from my mom's side of the family, though I tested out a Williamsburg variation of the recipe. That's still on the menu this year. My sister and I maintain important traditions like decorating the tree while listening to a BBC dramatization of Hercule Poirot's Christmas (because nothing says the holidays like a murder mystery), and she will read the January issue of Vogue on Christmas Eve. Our family is still adjusting to some major changes that took place this year, but we're determined to maintain the key rituals. How else will we know it's Christmas?

Vital to our Christmas Day dinner is the plum pudding. Another hold-over from my mom's side of the family, it draws on our English heritage and recalls the classic Charles Dickens Christmas. If you haven't tried plum pudding before, it's basically a soft cake filled with dried fruit, nuts, and (most importantly) booze. It's so historical that a mention of plum pudding first appeared in 14th-century England. 14th-century! That's 1300. Clearly, England has had plenty of time to perfect the recipe. The "modern" version of plum pudding, complete with dried fruit and suet (beef fat), probably came to England with Prince Albert when he married Queen Victoria in the 19th century.


So the Crawleys definitely would have served this kind of plum pudding at their Christmas feast. Mrs. Patmore would have begun the cooking process five weeks before Christmas, since it's an elaborate pudding (the British term for "dessert") that requires a lot of time and energy. Additionally, it's the kind of dessert that tastes the best when it's been around for a few weeks--that way the dried fruit can absorb the alcohol and the whole pudding gets nice and brandified. The alcohol also gives it a long shelf life, so you just need to let it sit in a cool, dark place. Traditionally, cooks made their puddings on the Sunday right before Advent, known as "Stir Up Sunday." (This is such a tradition that the Telegraph, a U.K. newspaper, published an article a few years ago about how few British citizens make their own puddings now. The horror!)

I am not nearly as well-prepared as Downton's cook, so I made mine on Saturday afternoon. It won't be quite as tasty with only a few days of ripening time, but we'll still enjoy it. You can even make yours the day of. Today you'll read about the preparation process, but I'll save the cooking process for a separate post. (I meant it when I said this was an involved recipe.)


Some notes before we begin:

  • You'll need a pudding mold to turn the batter into once it's ready. A pudding mold looks a lot like a Bundt pan, but it's ceramic or glass rather than metal. A Bundt pan, I have been assured, will not work. If you don't have a pudding mold, an oven-safe glass bowl will do the trick.

  • I adapted a recipe from a French classic that Mrs. Patmore certainly referred to (what with the Edwardians' obsession with French food). The changes are few but important.

    • First, I substituted butter for the suet. I was all set to use actual beef fat, but my mom was hesitant. Butter does just as well.

    • Second, I cut the ingredients in half, and it still produced way more batter than I was prepared for. Be sure to have a few glass bowls on hand in case your designated mold is filled too early.

my pudding mold

But don't be scared! Plum pudding just takes some careful preparation, and it's well worth the effort. Think of it as a culinary adventure!


Plum Pudding
(adapted from Escoffier: Le Guide Culinaire)

1 cup + 2 tbsp butter (or chopped beef suet)
1 cup + 2 tbsp breadcrumbs (I used leftover bread)
2/3 cup all-purpose flour
2/3 cup peeled, chopped apple
2/3 cup mixed raisins and sultanas
2/3 cup brown sugar, packed
2 tbsp chopped, crystallized orange peel (I used leftover orangettes)
2 tbsp ground ginger
1/2 tsp ground cinnamon
1/4 tsp ground nutmeg
1/4 tsp ground cloves
2 eggs, beaten
2/3 cup stout (I used Guinness)
1/3 cup brandy
juice and zest of 1/4 lemon and 1/4 orange

First:
Soak the raisins and sultanas in the brandy. You can do this overnight or an hour or two before preparing the mixture.

Second:
Prepare all the other ingredients. If using butter, melt over low heat. If using beef suet, chop it up into small pieces.

Mix the flour, breadcrumbs, brown sugar, and spices together in a large bowl. Then add the apple, crystallized orange peel, and citrus zest. Mix well. Finally, add the citrus juice, butter, eggs, and soaked raisins together with the remaining brandy. Add the stout at the very end, and mix until just incorporated.

Third:
Pour the batter into buttered pudding molds or glass bowls, filling until about 2/3 full. Stay tuned for the next post, where we cook the pudding!


Works cited: The Telegraph.

Tuesday, December 18, 2012

Dining at Downton: Mulled wine

It's getting to be that time when I start glancing at the calendar to see how many days are left. Not before Christmas (though that's another kind of concern) but before the premiere.

Yes, you know. The U.S. premiere of Downton Abbey Season Three.

January 6! That's less than a month away!

Josh and my sister and I can barely contain our excitement. I will probably need to review the first two seasons before that fated day in order for the story to be completely fresh in my mind. This kind of viewing--leisurely, paced, because I already know what happens--calls for something special to spice it up.

I'm talking mulled wine.

This recipe is particularly appropriate for the Downton Christmas special. I can imagine the Crowleys sipping mugs of spiced, mulled wine by the fire while they discuss the punch-up between Matthew and Sir Richard. Perhaps Mary and Matthew warmed themselves up with a tipple after their mutual declarations of love. It's the perfect thing for a cold, blustery evening, even if your winter's night features only British TV dramas and central heating. (I really do appreciate the modern comforts of home.)

I recently brewed a batch of mulled wine for a holiday party, pulling inspiration from Escoffier: Le Guide Culinaire (a cookbook Mrs. Patmore probably used) as well as from the latest issue of Bon Appetit. The Escoffier recipe is fairly mild, calling for only "zest of 1 lemon, a small piece of cinnamon and mace and 1 clove." I suppose a light hand with the spice makes sense, given the famed Victorian aversion to flavor. Since modern tastes are more adventurous, I added a few more cloves, some tangerines, and orange peel to boot. The result, I think, was well worth the tampering.


Mulled Wine
(adapted heavily from Escoffier: Le Guide Culinaire and Bon Appetit)

2 750-ml bottles of red wine (it doesn't have to be fancy)
3/4 cup sugar
1 1/2 cups apple cider
2 cinnamon sticks
2 tangerines
16 - 20 whole cloves
1 tsp dried orange peel
pomegranate seeds for garnish

Pour the red wine over the sugar in a large, heavy-bottomed pot. Heat over medium-low heat, stirring occasionally, until the sugar is dissolved. Add the cider.

While the liquid heats, prepare the tangerines. Press the cloves (by the sharp end) into the tangerines, using about half the cloves for each tangerine. This way you don't have to strain out the cloves later on.

Place the tangerines, cinnamon sticks, and orange peel in the wine mixture. Heat until steaming, then cover and turn the heat down to low. Serve after twenty minutes, garnishing with pomegranate seeds (if using), and keep warm for second (or third!) servings.

Wednesday, November 28, 2012

Candied orange peel (with chocolate)


Thanksgiving is over. The turkey's been roasted and eaten (or perhaps you tried a duck?), the festive harvest plates have been washed and put away for another year. And now everything in America is telling us it's time for the winter holidays: the pharmacies selling mechanical Santas, the radios playing nothing but Elvis, the twinkle lights and pine garlands draping storefronts.

It's all going a little too fast for me. How is it the holiday season already? We just got into fall! (It doesn't help that my school is rehearsing and producing a play in the three weeks before winter break. December's going to go like lightning.)


I like to move slowly into winter, preferably with something delicious to ease the transition. There's hot chocolate, of course, and mulled wine (more on that soon). But lately I've been craving something tangy, a treat with zip.

This candied orange peel fits the bill. I first learned how to make it a few years ago when my mom decided to bake stollen, a traditional German holiday bread studded with dried and candied fruit. Her grandmother (intimidatingly nicknamed "TuTu") used to bake stollen every winter, and my mom decided that she was ready to take on the baking challenge. So we spent a long, cozy morning cutting up oranges and simmering the peel in a thick syrup, then chopping those candied peels to mix into the bread. It was one of those lovely surprises of the holiday season, when you learn that your parents have these hidden traditions they never told you about.

Personally, I prefer the candied orange peel just as it is, maybe with a bit of chocolate to really make it decadent. The French call these chocolate-dipped gems orangettes, and you can learn more about them from Molly Wizenberg's blog of the same name. They're shockingly easy to make. And they're just the thing to wake up your senses as you settle into a long, cold winter.


Candied Orange Peel (Orange Sticks)
(adapted from The "Settlement" Cook Book)

1 orange, scrubbed
1/2 cup plus 1 tbsp granulated sugar, divided
1/4 cup hot water
optional: 1/4 - 1/2 cup semisweet chocolate chips

To make the orange peel:
Score the orange lengthwise into four sections. Carefully remove the peel from the orange, making sure to keep each section in one piece. You should have four sections of peel. Carefully cut each section into narrow  slices, about 1/4 inch wide.

Place the slices in a medium saucepan and cover with water. Bring to a boil, then drain off the water. Repeat process four more times. This will blanch the bitterness from the orange peel.

Set aside the orange peel. In the same saucepan, mix 1/2 cup of sugar and the hot water and cook over low heat, stirring often, until sugar is dissolved. Place the blanched orange peel back in the pan with the simple syrup and stir to coat. Cook over low heat, stirring often, until the syrup is mostly evaporated, about 20 minutes.

Remove the orange peel from the saucepan and drain off the excess syrup (or pour it into your tea, as I did). Sprinkle the remaining tbsp of sugar over a flat surface and carefully roll the orange slices in the sugar, using tongs or a spoon, until coated. Place on a wire rack to cool.

For chocolate dip:
Melt the chocolate chips in a double boiler over medium-low heat. When the chocolate is just melted, dip the ends of the orange peel in the chocolate. Let cool on a piece of wax paper. 1/4 cup of chocolate chips will be sufficient for about half the slices.