Showing posts with label victorians. Show all posts

Monday, September 16, 2013

Afternoon Adventure: Vanderbilt Mansion, Hyde Park


About a month ago I met up with my parents in Hyde Park, New York, for a weekend of sight-seeing and poking around historic places (this is the order of the day with my family). After touring two painters' homes on the first day, we headed to the Vanderbilt Mansion bright and early on Saturday. Now, I have seen my share of Vanderbilt mansions, and those of their friends. Living so close to Newport, it's basically a law that I have to make a yearly pilgrimage to the Breakers or Marble House. But I'd never seen the mansion in Hyde Park.

the entrance hall

Friends, it was worth it. It was the American version of Downton Abbey.

The Vanderbilts were one of the wealthiest families in the 19th century. Patriarch Cornelius Vanderbilt created a shipping and railroad empire in the early 19th century, and his children and grandchildren used that money to build magnificent mansions during the Gilded Age, following the Civil War. Only a few of his descendants used their inheritances wisely--most of the family, including those who lived at Newport, became famous for throwing money around and trying to marry their children off to British royalty. However, grandson Frederick William actually grew his inheritance, and he got to build a bunch of beautiful residences to boot. So we made our way to his "country palace" in Hyde Park.


Frederick and his wife Louise purchased the estate as a country home, and while they often entertained friends there, for the most part it was just the two of them. Well, and loads of servants.

Louise's bedroom, because we all need a gated bed

The mansion is a gorgeous example of late-Gilded Age architecture and decoration, complete with servants' quarters that mimic the design of the public rooms. The first floor, designed for entertaining, is laid out in an oval, with dining and sitting rooms fanning off to the sides. The second floor is no different, with a gallery in the center to let light filter down to the first floor. From there you can peek into bedrooms, ranging from "simple" quarters for guests to the his-and-hers bedrooms designed to look like the palace at Versailles. A few rooms were even set up as though the Vanderbilts had left for the season; white cloths covered all the furniture and only a single lamp lit the interiors.


What fascinated me about this house was the sharp contrast between upstairs and downstairs. This is Downton Abbey-speak for the employers (who lived "upstairs") and employees (who lived "downstairs") of the Gilded Age in America. Though the basement servants' floor was laid out in the same manner as the first and second floors, the decoration was completely different: dark wood free of ornamentation, small windows that didn't let in much light, simple furniture. The servants' staircase was painted silver to mark the shift from the gold in the public rooms.


A staff of over 60 kept the house running during the entertaining season, while the Vanderbilts only ever entertained, at maximum, 16 guests. It was easy to picture a Downton-like lifestyle at Hyde Park, and in a way that's what the Vanderbilts were going for.


Wealthy Americans in the 19th century longed for the class and distinction they felt came with a European background. They traveled to Europe and purchased all the old art and sculpture and furniture they could find, because they felt American art and furniture wasn't refined enough. By building such a palace and staffing it to the nines, the Vanderbilts, like many wealthy families, were trying to become European. No wonder the place felt so English!

Saturday, April 20, 2013

Afternoon Adventure: Servant Life Tour at The Elms


I want to say something meaningful about all this horrifying news coming out of Boston, but I can't find the words. There's only so much sadness I can take in at a time, especially when it's on such a vast scale as the Marathon and a citywide manhunt. At some point I just need to turn off the news. Maybe I'm avoiding reality, but once you have the basic information, how helpful is it to dwell on tragedy that doesn't personally touch you?

Instead, I want to think about the still-beautiful things.

On Tuesday, Josh and I drove down to Newport to visit The Elms, one of the mansions on Bellevue Avenue. We listened to NPR for the first half of the trip, but after a while it got to be too much, hearing such gruesome details about limbs lost as we passed flowering trees and sparkling water. So we turned to a music station, though not without feeling a bit callous for enjoying such a beautiful day.

As we wound through the scenic downtown, stopping for pedestrians and peering at the porched and gabled houses in colorful hues, the sadness of the real world seemed to lessen. That only continued when we arrived at The Elms, the one-time summer residence of the Berwinds, who made their fortune in coal. Unlike some of the mansions in Newport (cough Marble House cough), The Elms is a tasteful spinoff of an 18th-century French chateau (but that must be an oxymoron in itself, right?). Lavish statues decorate the grounds and refined gardens, and the interior resembles a fine art museum more than a residence. But you don't get the sense that the owners were trying to show off their wealth quite as much as other Newport residents.


In the 19th century, Newport, RI became a summer playground for the wealthy of New York and Philadelphia. Families like the Vanderbilts and Astors constructed lavish mansions, which they called "summer cottages," and they spent their summers having parties and taking the sea air away from the city. They sent groups of servants to Newport a few weeks in advance to open up the houses and prepare for the summer season, and they hired summer staff to help out with the massive parties they threw almost daily. Today many of these mansions are still standing, and you can visit a lot of them thanks to the work of the Newport Preservation Society.


We've been on a number of "regular" mansion tours in Newport over the past few years, so we decided to go on the "behind the scenes" Servant Life tour. Instead of wandering through the lavish parlors and second parlors and bedrooms, we came in through the servants' entrance on the side, passing under wisteria grown specifically to mask the servants' comings and goings. We hiked up four flights of back stairs to the servants' quarters, which resembled dormitories more than anything else (and were not divided by gender, as in Downton Abbey). We went out on the roof, where the servants could take smoke breaks or hang out when off-duty, camouflaged by an immensely tall wall. And we plunged into the basement boiler room and peered at the coal delivery system, a long tunnel with its own delivery cart.


Our guide told stories of Mr. Berwind firing all 40 members of the summer staff at once for having the gall to request a full day off in the summer. Of 18-hour days when the Berwinds entertained friends and colleagues. Of Irish immigrants finding their first jobs at the mansion and moving on to bigger and better things, like working as seamstresses. The guide didn't tell as many stories as I was hoping for, but nevertheless it was a fascinating glimpse into the "downstairs" life of the Newport mansions.


As we drove back towards Providence, I could feel the solemnity of the real world creeping back in. But instead we rolled down the windows and let the wind ruffle our hair, and tried to stay in that bygone world of servants and wealth just a bit longer. Sometimes a historical afternoon adventure is just the escape you need.

Thursday, March 14, 2013

Dining at Downton: Kedgeree

Kedgeree is the very first dish served on Downton Abbey. Mrs. Patmore sends a steaming bowl up for breakfast, and with that we're immersed in the sumptuous world of Edwardian cuisine. Brits still eat kedgeree today, and it's one of those dishes that carries a few hundred years of British history along with it. Plus, the name is fascinating, since it directly reflects British colonialism.

Kedgeree originated as khichri, an Indian meal of rice and lentils, often served with chopped, hard-boiled egg. During British occupation of India, the English adapted the dish to their own tastes and eventually brought it back to the home country, where it caught on as a breakfast food. Kedgeree, as it became known (note the Anglicization), featured rice, fish, and egg, with a variety of spices and garnishes depending on the recipe. It was a great way for cooks to use up leftovers in the days before refrigeration, and it was seen as a rather "adventurous" dish. By the time Mrs. Patmore served it at Downton, kedgeree was entrenched in the British breakfast menu.

To make my own, I turned to Mrs. Beeton, that domestic goddess of the Victorian era. Surely, if anyone knew how to make kedgeree, it would be she. But after following her recipe to the letter, I did some comparison research and discovered that she is basically the only person who made it this way.


Beeton calls for leftover rice, "any cold fish," and two soft-boiled eggs, along with assorted seasonings and mustard. Every other recipe I've found, historic and modern, calls for smoked fish and hard-boiled eggs, with mustard seeds (or none at all). These are subtle but noticeable differences, friends. I can't help wondering if this is one of those old recipes where you really had to know what the writer meant in order for the dish to turn out remotely well. Like, did Mrs. Beeton mean "mustard seeds" when she called for mustard? Did "soft-boiled eggs" back in the Victorian day actually mean "hard-boiled"? In other words, is this recipe just code for a completely different recipe?

We'll just have to keep on wondering.

I've set down my version of Beeton's recipe below, and it's not bad. I used cod, which has a pleasant, mildly fishy flavor, and the seasonings and egg actually blend nicely. But it bears little resemblance to anything that originated in India.


Kedgeree
(adapted from Mrs. Beeton's Book of Household Management)

1/2 lb cod fillet
1 1/3 cup brown rice, cooked
2 tsp mustard
2 eggs
1 tsp butter, cubed
salt and cayenne pepper, to taste

To make the fish:
Set the fish in a pot and cover with cold water. Set the pot over a high flame and bring to a boil. Immediately remove from the heat and let sit for ten minutes. Remove the fish and let cool.

To make the eggs:
Boil a small pot of water over high heat. As soon as the water boils, turn the heat down to a simmer. Crack the eggs in a small bowl and slip into the hot water, using the side of the pot to guide the eggs into the water so they don't break. Cook for 5 minutes and remove from water.

To make the kedgeree:
Flake the cooked fish into small pieces. Mix with the brown rice, mustard, eggs, and butter. Add salt and cayenne pepper to taste. Serve hot.

Monday, January 7, 2013

Dining at Downton: Fried oysters

How many of you watched the Season 3 premiere of Downton Abbey last night? We did, after some technical difficulties, and it was every bit as lavish and funny and swoony as we'd hoped. While a certain someone (cough Josh cough) kept inserting comments about one character's rumored departure from the show, I was on tenterhooks every time it seemed like things were finally going right for the Crawleys. This show, I tell you! Every time you think it's going to end happily, someone dies or loses their reputation.

Last night's episode also provided an inside glimpse at the complicated dining rituals at Downton, courtesy of O'Brien's clumsy nephew. He's been hired as a new footman, but since he trained as a hotel waiter, he bungles the dinner service. Instead of offering a dish and allowing each diner to serve him or herself, he tries to place the vegetable or fish directly onto the diner's plate! Oh, the horror! Who knew that dinner was so fraught with peril?

(Then again, Branson would surely agree with that sentiment.)

For families like the Crawleys, it was fashionable to dine a la russe, or in the Russian style. Rather than serve all courses on the table for diners to help themselves (service a la francaise), staff would bring each course out individually. With the butler supervising, footmen would serve guests from the left, allowing them to take what they wished from the proffered plate.

It seems like a lot of extra work, with too many complicated rules, but that was exactly the point. Dining a la russe allowed hosts and hostesses to show off their wealth--"Look! I can afford this many footmen!"--as well as their social status. The host would give the signal for all guests to eat, stop eating, and for each course to be served. It was the perfect environment for a host accustomed to power.

Not surprisingly, it was also the perfect environment for new footmen to mess up. And though the Crawleys might gloss over the footman's mistake in front of their guests, that kind of difficulty showed the cracks in a family's perfect facade.

Josh and I dined in a more modest environment last night (i.e. the couch and coffee table), but our meal was no less elaborate. I bought a dozen oysters from the Matunuck Oyster Bar stand at the farmers' market, and proceeded to learn quite a lot about how to open oysters without an oyster knife. It's tricky! In the end, I resorted to heating the oysters in the oven for a few minutes, then prying them open with a butter knife. That did the trick, but it also turned me forever against preparing oysters at home.

This recipe, taken from Mrs Beeton's Book of Household Management, would have been well-received at the Crawleys' dinner table. It's basic, using only a few ingredients (and who knew the Victorians used ketchup?), but the taste is sublime. Buttery, salty, with a hint of the sea.

And thankfully, Josh and I don't care if one of us bungles the dinner service.


Fried Oysters
(adapted from Mrs Beeton's Book of Household Management)

1 dozen oysters, scrubbed
2 tbsp butter
1 tsp ketchup
1 tsp lemon juice

Open the oysters. If you need to do it the MacGyver way, heat the oven to 400 F. Set the scrubbed oysters in a pan in the oven for 5-7 minutes, then dunk them in a bowl of ice water and drain. Hold each oyster in the palm of your hand, deep shell down, and use a butter knife to pry the hinge of the oyster apart. Drain the liquid into a bowl and scrape out the oyster meat into the same bowl.

Heat the oysters and their liquid in a small pot until boiling. Boil one minute. Drain the liquid. Heat the butter in a small frying pan over medium heat until sizzling, then cook the drained oysters for 3-4 minutes. At the end of cooking, stir in the ketchup and lemon juice until oysters are evenly coated. Serve immediately.

Thursday, December 27, 2012

Dining at Downton: How to serve plum pudding


We had a relatively quiet Christmas here in Ohio, seeing family and telling funny stories and going for long, snowy walks and eating good food. As per tradition, we served plum pudding for dessert on Christmas night, along with a lot of other treats (frosted cookies, red velvet cake, petit fours...). We don't mess around with dessert.

As I mentioned a few days ago, the serving of plum pudding is half the fun. Once you've steamed the pudding so it's nice and hot (2 hours at 350 degrees, back in the mold and the double boiler you set up to cook it the first time), you turn the pudding out into a heat-resistant dish. Heat up a little brandy on the stove, pour it evenly over the pudding, and hold a lit match close to the pudding. The fumes from the brandy should pick the flame right up and set the whole pudding alight. In a darkened room with all the family sitting around a candle-lit table, there's nothing quite like it: blue flames dancing around the dish, creating a magical feeling.


Unfortunately, our evening did not go exactly according to plan.

The brandy we ended up using was just too old, so the flames died out almost immediately. Here is the only picture we could get of bringing the pudding to the table--if you look closely, you might see the blue flames as they dwindled to nothing.


That doesn't mean the pudding wasn't delicious, though! The days it spent ripening in the cold did it good, and the pudding was light and fruity with a citrusy zing. It had a tender, spongy crumb that contrasted well with dabs of rich hard sauce.

If you celebrated the holidays this December, I hope you enjoyed equally delicious food and fun company. (I also hope that your projects went a little more according to plan than mine!)


Previously:

Monday, December 24, 2012

Dining at Downton: How to steam plum pudding

On Saturday we talked about how to make your own plum pudding, the most classic of British holiday desserts. (Yes, I am still wondering where the plums are in the recipe.) Today we'll discuss the cooking process, which is a rather elaborate steaming method. It requires parchment paper, cooking twine, a water bath, and lots of patience.

My dad was fascinated by the process from start to finish. He's an engineer by trade, and he's the kind of cook who loves the science of the kitchen. He will turn out renditions of his mother's pumpkin pie recipe until he has the ingredient ratio just right (much to my mom's dismay). He will collect recipes for beef bourgignon and combine instructions from each to make the best possible stew. He will then exchange observations on the proper way to brown beef with me over the phone. (He also went to great lengths to find out why the one American manufacturer of plum pudding stopped producing it, which is how I ended up making the pudding in the first place.) Put simply, my dad likes method.

"You should take photos of that!" he said as I removed the steaming pudding from the water bath. "And how did you tie the parchment paper down again?"

As he noted, this is a delicate process. So here are your highly expert instructions, just the way my dad likes them.

Step One
Preheat the oven to 350 F.

Once your pudding is mixed and ready to cook, turn the mixture into a well-greased pudding mold or glass bowl. Remember, a pudding mold looks like a Bundt pan, with a ring in the middle to ensure proper steaming. I got mine at Stock, a lovely little cooking shop that recently opened in Providence.


Step Two
Next, cut a piece of parchment paper to cover the top of the mold. Leave about six inches of overhang on all sides of the mold. Fold the paper twice in the middle to create a slight overlay--this will allow steam to accumulate without tearing the paper.

Step Three
Cover the mold with the parchment paper and use a length of cooking twine to tie the paper to the mold, just below the rim. Trim excess paper.


Step Four
Create a handle for the mold, so you can lift it out of the steam bath. Cut a long length of cooking twine and wrap it around the mold as though wrapping a present, laying the twine flat across the top, bringing it down the sides of the mold and crossing underneath. Bring the twine up to the top again on the empty sides of the mold, and slide the twine underneath the cross line on top of the parchment paper. Tie the ends of the string together to create a looped handle.


Step Five
Pour hot tap water into a large stockpot or Dutch oven (I used the latter) that can accommodate the mold with at least an inch of space on all sides. Fill with water so the oven is about 1/3 full. Place the prepared mold in the Dutch oven and cover the whole thing with the oven lid. Put in the oven to steam for about 3 hours. It will make your house smell like citrus and deliciousness.


Step Six
Periodically check the oven to make sure the water hasn't evaporated completely. You may need to pour in more water. When the pudding pulls away from the sides of the mold (about 3 hours), it's done. Carefully remove from the water bath using the string handle, and lift up the parchment paper to make sure the pudding is ready. Cool in the mold completely before turning out onto a plate.

Step Seven
Now that the pudding has cooked, you can eat it straight away or let it ripen over time. If you choose to let it sit, cover the cooled pudding and store in a cool, dark place (we put it in our 1960s-era bomb shelter) until ready to eat. Pudding will keep for at least five weeks. Be sure to warm it before serving by replacing it in the mold or bowl, then steaming for about 2 hours at 350 F.

The very last segment of this culinary adventure is my favorite: setting the pudding on fire at the table! Check back in a few days for photos of our own flaming pudding. (If you want to serve your own pudding before then, warm a small amount of brandy on the stove, then pour over the warm pudding. Immediately hold a lit match close to the pudding, and the brandy will catch on fire. Bring to the table in a darkened room for maximum effect and applause. Once the flames have died, serve with brandy butter or hard sauce.)

Note: It's possible to steam the pudding with a Crockpot instead of in the oven. See this page for complete instructions.


Works cited: Irish American Mom. Pittsburgh Post-Gazette.

Saturday, December 22, 2012

Dining at Downton: How to make plum pudding

This time of year, my family is all about tradition. Previously I wrote about the Brunswick stew we've kept from my mom's side of the family, though I tested out a Williamsburg variation of the recipe. That's still on the menu this year. My sister and I maintain important traditions like decorating the tree while listening to a BBC dramatization of Hercule Poirot's Christmas (because nothing says the holidays like a murder mystery), and she will read the January issue of Vogue on Christmas Eve. Our family is still adjusting to some major changes that took place this year, but we're determined to maintain the key rituals. How else will we know it's Christmas?

Vital to our Christmas Day dinner is the plum pudding. Another hold-over from my mom's side of the family, it draws on our English heritage and recalls the classic Charles Dickens Christmas. If you haven't tried plum pudding before, it's basically a soft cake filled with dried fruit, nuts, and (most importantly) booze. It's so historical that a mention of plum pudding first appeared in 14th-century England. 14th-century! That's 1300. Clearly, England has had plenty of time to perfect the recipe. The "modern" version of plum pudding, complete with dried fruit and suet (beef fat), probably came to England with Prince Albert when he married Queen Victoria in the 19th century.


So the Crawleys definitely would have served this kind of plum pudding at their Christmas feast. Mrs. Patmore would have begun the cooking process five weeks before Christmas, since it's an elaborate pudding (the British term for "dessert") that requires a lot of time and energy. Additionally, it's the kind of dessert that tastes the best when it's been around for a few weeks--that way the dried fruit can absorb the alcohol and the whole pudding gets nice and brandified. The alcohol also gives it a long shelf life, so you just need to let it sit in a cool, dark place. Traditionally, cooks made their puddings on the Sunday right before Advent, known as "Stir Up Sunday." (This is such a tradition that the Telegraph, a U.K. newspaper, published an article a few years ago about how few British citizens make their own puddings now. The horror!)

I am not nearly as well-prepared as Downton's cook, so I made mine on Saturday afternoon. It won't be quite as tasty with only a few days of ripening time, but we'll still enjoy it. You can even make yours the day of. Today you'll read about the preparation process, but I'll save the cooking process for a separate post. (I meant it when I said this was an involved recipe.)


Some notes before we begin:

  • You'll need a pudding mold to turn the batter into once it's ready. A pudding mold looks a lot like a Bundt pan, but it's ceramic or glass rather than metal. A Bundt pan, I have been assured, will not work. If you don't have a pudding mold, an oven-safe glass bowl will do the trick.

  • I adapted a recipe from a French classic that Mrs. Patmore certainly referred to (what with the Edwardians' obsession with French food). The changes are few but important.

    • First, I substituted butter for the suet. I was all set to use actual beef fat, but my mom was hesitant. Butter does just as well.

    • Second, I cut the ingredients in half, and it still produced way more batter than I was prepared for. Be sure to have a few glass bowls on hand in case your designated mold is filled too early.

my pudding mold

But don't be scared! Plum pudding just takes some careful preparation, and it's well worth the effort. Think of it as a culinary adventure!


Plum Pudding
(adapted from Escoffier: Le Guide Culinaire)

1 cup + 2 tbsp butter (or chopped beef suet)
1 cup + 2 tbsp breadcrumbs (I used leftover bread)
2/3 cup all-purpose flour
2/3 cup peeled, chopped apple
2/3 cup mixed raisins and sultanas
2/3 cup brown sugar, packed
2 tbsp chopped, crystallized orange peel (I used leftover orangettes)
2 tbsp ground ginger
1/2 tsp ground cinnamon
1/4 tsp ground nutmeg
1/4 tsp ground cloves
2 eggs, beaten
2/3 cup stout (I used Guinness)
1/3 cup brandy
juice and zest of 1/4 lemon and 1/4 orange

First:
Soak the raisins and sultanas in the brandy. You can do this overnight or an hour or two before preparing the mixture.

Second:
Prepare all the other ingredients. If using butter, melt over low heat. If using beef suet, chop it up into small pieces.

Mix the flour, breadcrumbs, brown sugar, and spices together in a large bowl. Then add the apple, crystallized orange peel, and citrus zest. Mix well. Finally, add the citrus juice, butter, eggs, and soaked raisins together with the remaining brandy. Add the stout at the very end, and mix until just incorporated.

Third:
Pour the batter into buttered pudding molds or glass bowls, filling until about 2/3 full. Stay tuned for the next post, where we cook the pudding!


Works cited: The Telegraph.

Thursday, September 27, 2012

Dining at Downton: The perfect cup of tea

You know you're in a committed relationship when you start buying the foods your significant other likes. When Josh and I started dating, we quickly discovered that while we both enjoy tea, there are a few major differences in our habits:
  • Josh loves green tea
  • I prefer black tea, but usually I'd rather drink coffee
  • Josh hates coffee
They pose a few difficulties, right? Well, when I started buying special green teas at the grocery store and Josh invested in a Keurig machine for my individual cups of coffee (he is so good to me), that's when I knew it was serious. I've adjusted to his love of green tea, and I'll even sip some now and then. But my heart still thrills to the scent of Earl Grey. Every time I make myself a cup of black tea, I feel like I'm getting away with something.

So I might as well learn how to make the perfect cup of tea, to make those stolen moments that much more enjoyable. And, you know, just in case Violet, Dowager Countess comes to visit.

Our first Dining at Downton post is concerned with that most basic of aristocratic skills: brewing tea. It's a little more involved than boiling water; in fact, the ritualistic aspect of it is probably the best part. Plus, you get to indulge in fancy china! (Pro tip: Anthropologie has beautiful tea services.)

Afternoon tea is a staple at Downton Abbey. In the 19th century, well-to-do Brits adopted the custom of taking afternoon tea as an elegant snack. You'd drink tea, eat sugary biscuits and tiny sandwiches, and catch up on all the latest gossip. As devotees of Downton Abbey know, afternoon tea is fraught with import, whether it's because the girls are planning how to find eligible bachelors, or because middle-class Matthew Crawley is discovering that he'll be waited on hand and foot at Downton. (In a later post, we'll discuss how to create a full afternoon tea meal.)

Little has changed about brewing tea since Queen Victoria's times, when afternoon tea first became a custom. So for instructions, I turned to Mrs Beeton's Book of Household Management, which was the authority on cooking and housekeeping in 19th century Britain.

Mrs. Beeton claims that "[t]here is very little art in making good tea," but nevertheless provides detailed instructions for the brewing process. Here they are, updated for the modern reader.

You'll need:
loose tea
  • 1 large teakettle for boiling water
  • 1 smaller teapot for brewing the tea
  • loose-leaf tea (1 tsp per person, plus 1 for the pot)
  • teacups and saucers
  • 1 tea strainer
  • milk, cream, and sugar as desired
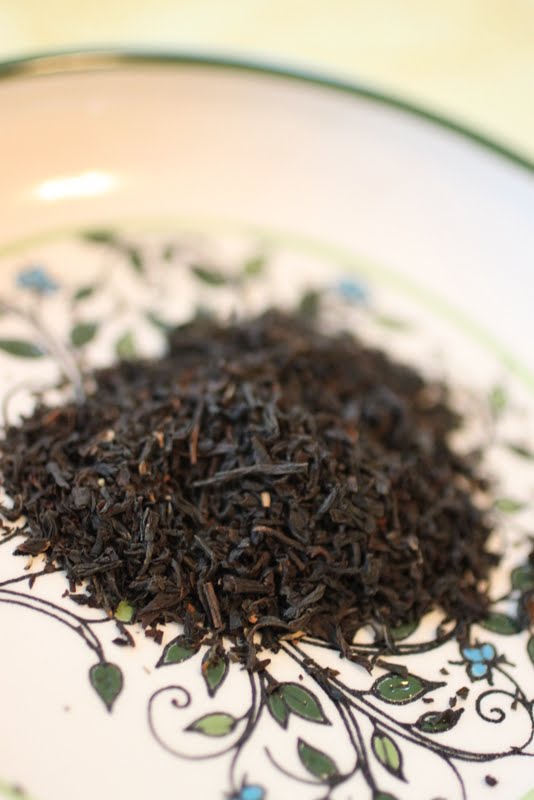
Once you've assembled your materials, fill the large teakettle with water and heat until boiling. Pour enough boiling water into the smaller teapot to fill, then let sit for 2-3 minutes. This heats up the teapot so it will keep the tea warm for a longer time. Meanwhile, measure out the tea you'll need. Mrs. Beeton recommends "the old-fashioned plan" of 1 tsp per person, plus 1 tsp "for the pot." When I make tea for myself, I like to use 2-3 tsp of tea total, depending on how much I want.

When the china teapot is warm, pour the water back into the larger teakettle. If you'd like, reheat it so it's freshly boiled. Measure the loose tea into the china teapot, then pour the boiling water back in. Cover and let steep for 5-10 minutes. This is very important, according to Mrs. Beeton; otherwise the leaves won't open, and "the beverage will consequently be colourless and tasteless."

When you're ready to pour, set the strainer over the teacup to catch any loose tea. Pour, and doctor with milk, cream, and/or sugar as you like.


My perfect cup of tea: Earl Grey with a bit of cream, no sugar.

What's your perfect cup?

Monday, September 24, 2012

A very British announcement!


It's no secret that I'm a bit of an Anglophile. This, combined with my love of history, made me fall utterly and irrevocably in love with Downton Abbey.

For those of you not in the know, Downton Abbey is a PBS historical drama (ITV in the UK) chronicling the secrets, romances, and tragedies of the aristocratic Crawleys and their staff on the eve of World War I. Sounds like your typical stuffy English period drama, right? Well, for some reason, we Americans have gone absolutely batty for it. It has everything we love in a TV show: scandalous rendezvous, British accents, backstabbing, murder charges...and Maggie Smith.

The second season follows the Crawleys through the devastation of WWI, and the third season, which debuts in January, promises new intrigue. But January is oh-so-far-away, and I can't give up an excuse to try out new historical recipes. So I'm extremely excited to introduce a new series for the blog:

Dining at Downton will feature all the recipe testing and historical tidbits you've come to expect from regular posts, plus fanciful speculations as to what Lady Mary might have eaten before, say, going out on a hunt with her future paramour. Of course, this is meant only to be a fun experiment, unauthorized and all (with apologies to Julian Fellowes). It's a leap across the pond from what we've been talking about so far, but hopefully it will be a fruitful and fun adventure.

Don't worry, the regular recipes aren't going away. You'll still find stories, photos, and American history here, just a bit more spread out.

I'm thrilled about this new series, and I hope you will be, too. Special thanks to Josh for creating the beautiful banner. Now, let's talk! Are there any British recipes you'd like to see on the blog? Certain Downton episodes we should discuss? I'm always up for a good dish on the Crawley sisters...

Wednesday, February 15, 2012

Signed, sealed


Valentine's Day is a tough thing to write about because there's so much baggage attached to it. The single folks think you're cruel for reminding them of their single plight, or they take it in hand and have an anti-Valentine's Day. Meanwhile there are the folks in the blase corner who say they don't need Hallmark to help them out in matters of the heart. Having been in the first* two** camps at some point in my life, I'll keep this post short so as not to step on any toes. But I wanted to share a historically-appropriate craft with all of you to mark the occasion.

Giving cards as a token of affection didn't take off as a trend until around the 1840s, when advances in printing techniques made it easier to mass-produce greeting cards. The Victorians went wild with the possibilities, and they produced elaborate lace confections for their sweethearts. Cards unfolded to reveal secret messages, or love poems were written in tiny letters around ornate knots. There were even some super-depressing cards made by Civil War soldiers who thought they were never coming home, complete with drawings of broken hearts.

So while I don't have a colonial card to share with you, I did make one of the simpler, more clever Victorian cards for Josh (lucky man). It's called a puzzle purse, and you make intricate folds in a square piece of paper to enclose a message of your choosing. When folded correctly, the paper closes up into a sealed square. It's sort of like origami, and exactly the kind of intricate thing the Victorians loved.


It's the perfect size for tucking into your love's pocket as a secret surprise. (Or, you know, presenting with an awkward flourish. 'Cause I'm cool like that.)


* college: cupcakes in the dining hall, couples walking hand-in-hand around campus wearing their fanciest clothes. Hard to ignore.

** high school: a night of shopping, sushi, and required viewing of Cruel Intentions. Yeah.

P.S. If you'd like to make your own puzzle purse, instructions are here.